
Support
Last Update: January 19, 2026
How to start a session
Starting a session on symptom checker is a simple process
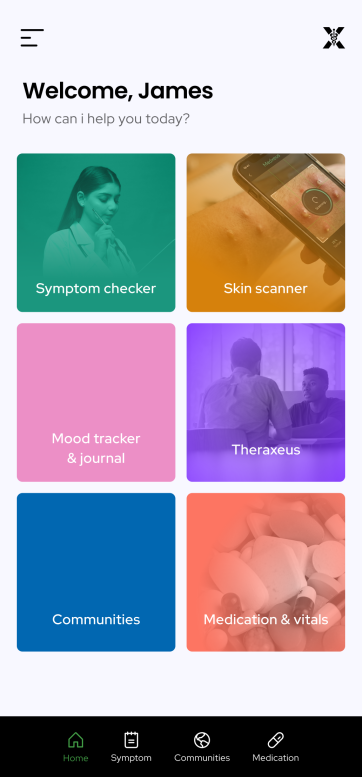
Step 1: Access Symptom checker
Navigate to the symptom homepage within the app. (You can also update your baseline health information in your profile beforehand so the AI can provide a more accurate analysis).
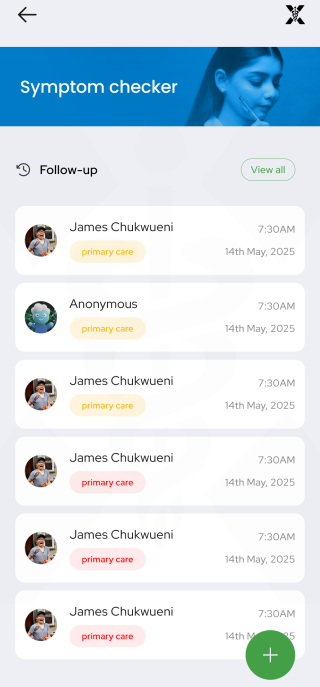
Step 2: Click on + button to begin
Clicking on the plus button to start a new session for symptom checking.
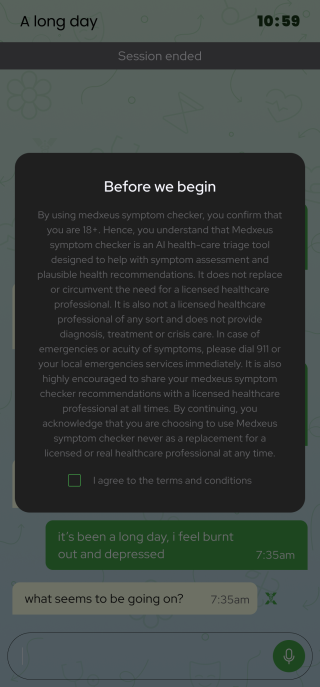
Step 3: Acknowledge Disclaimers
Before beginning, you will likely need to view and accept the "Theraxeus disclaimer." This step ensures users understand the legal boundaries and that the AI is not a replacement for professional emergency medical care.
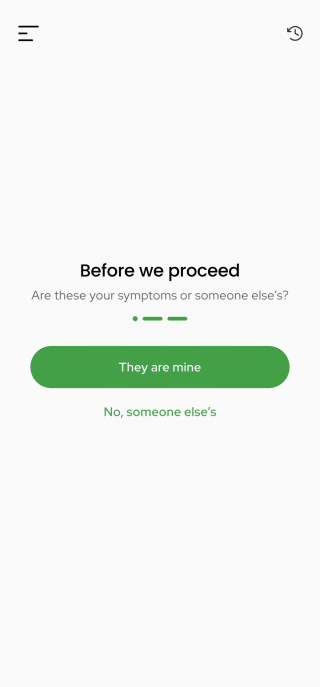
Step 4: Confirm who the session is for
To make sure that the AI has the right reference data, it is necessary to confirm who the session is for.
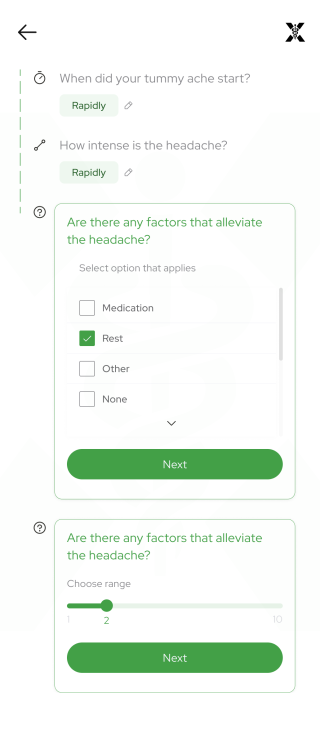
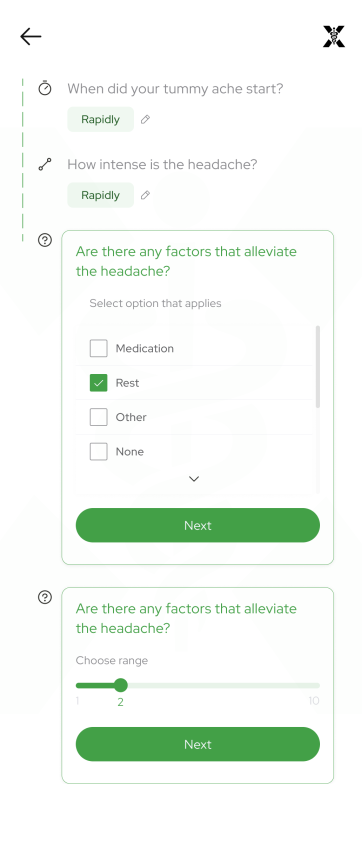
Step 5: Answer the questions as the session progresses
It is very important to answer the questions to the best of your knowledge to ensure more accuracy in the result diagnosis.
Step 6: View result from the session
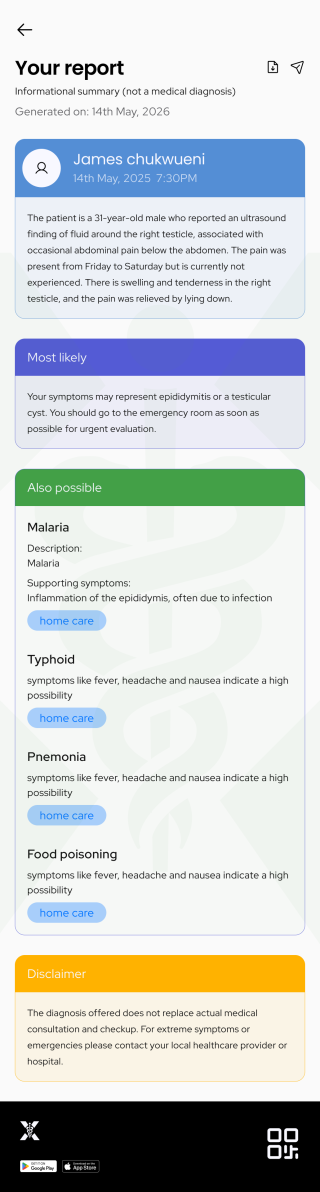
At the end of the session, a view result button will be available and clicking on it leads to the result page.
Ending a session
A session on symptom checker stops automatically after the proper number of questions have been answered and the algorithm affirms that a proper symptom has been noticed.
Resuming a session
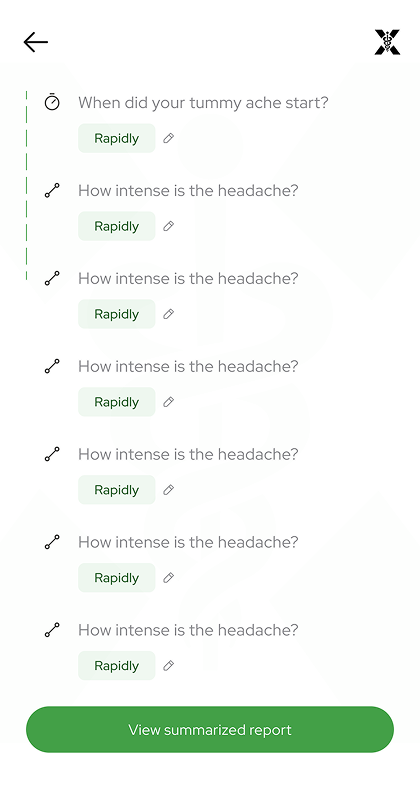
If a session is left or exited before a summary report is generated, the session is kept active till you revisit it for continuation. Follow the steps below to resume an active session.
Step 1: Access Symptom checker
Navigate to the symptom homepage within the app. (You can also update your baseline health information in your profile beforehand so the AI can provide a more accurate analysis).
Step 2: Find the session
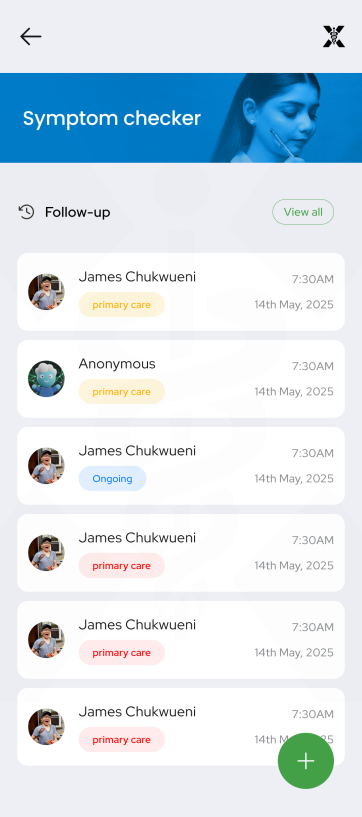
Scroll through the history screen to find the active sessions, they will be tagged with "ongoing".
Step 3: Click on the session
Clicking on the session resumes the session from its last saved point.
Downloading your report
After your session is completed, you are able to download the result generated for sharing or future reference.
Step 1: Access Symptom checker
Navigate to the symptom homepage within the app.
Step 2: Find the session
Scroll through the history screen to find the completed session, they will not have an "ongoing" tag.
Tap the download icon on the report
On the report screen, tap the download icon in the top-right corner. Your report will be saved as a PDF to your device.
Report ready to download
Tap the ↓ icon above
Tension headache
How to start a session
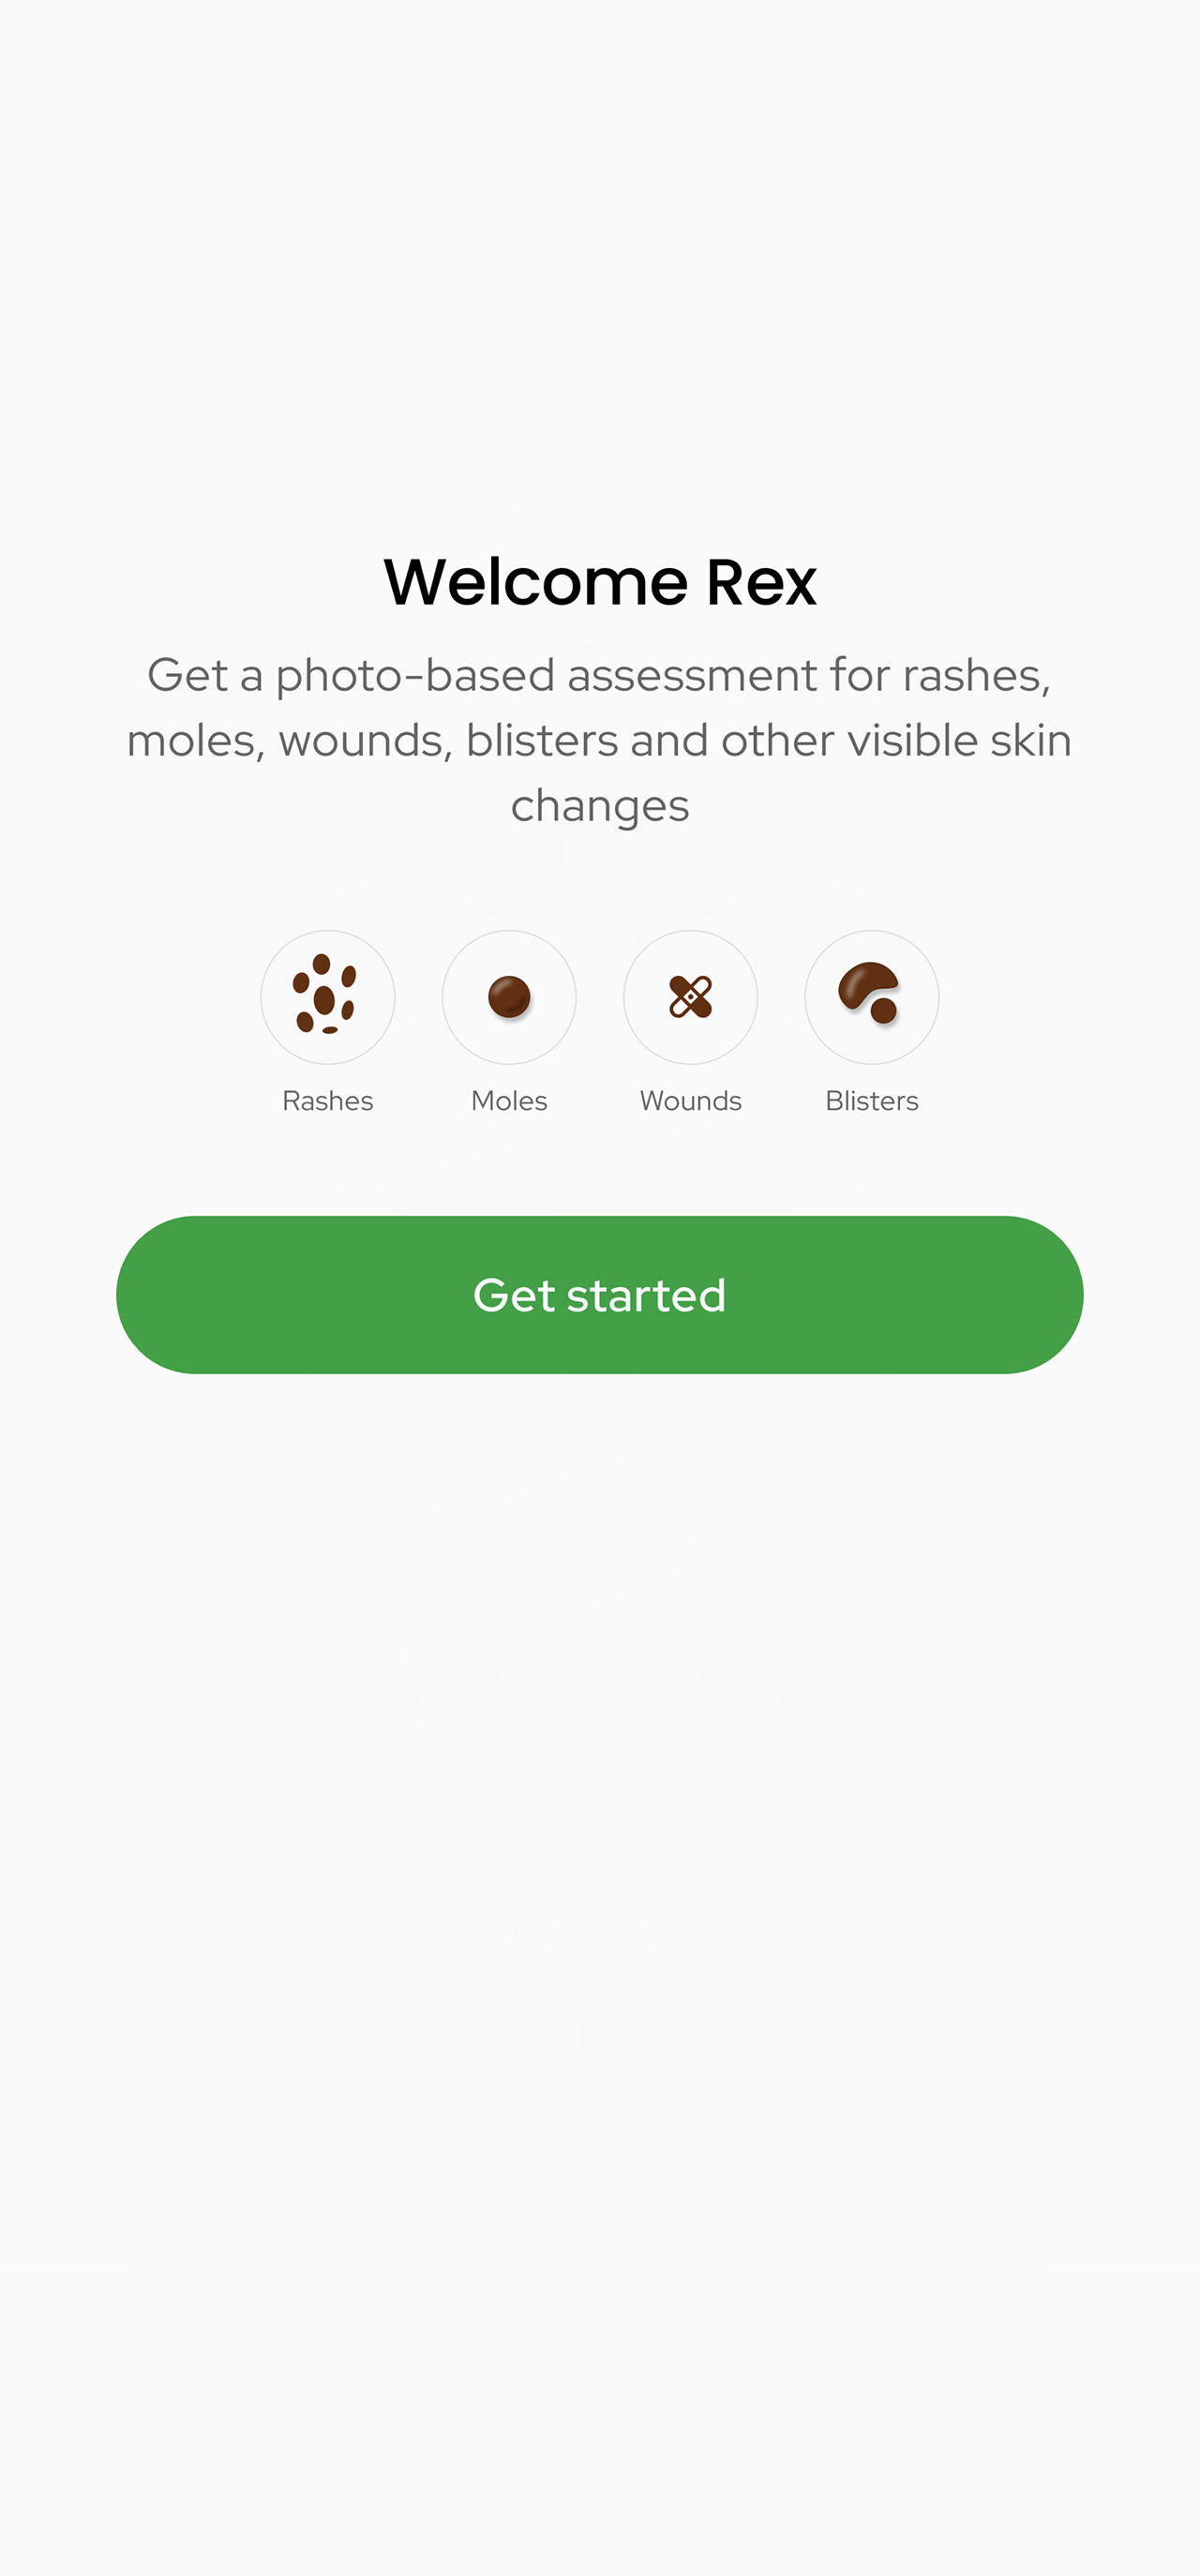
Follow the step-by-step process to begin a skin scan session
Step 1: Access Skin scanner
Navigate to the homepage within the app. (You can also update your baseline health information in your profile beforehand so the AI can provide a more accurate analysis). Click on skin scanner to begin a session.
Step 2: Click on get started to begin the session
For a first time use, it is important to go through the onboarding process, read the instructions and follow its guide.
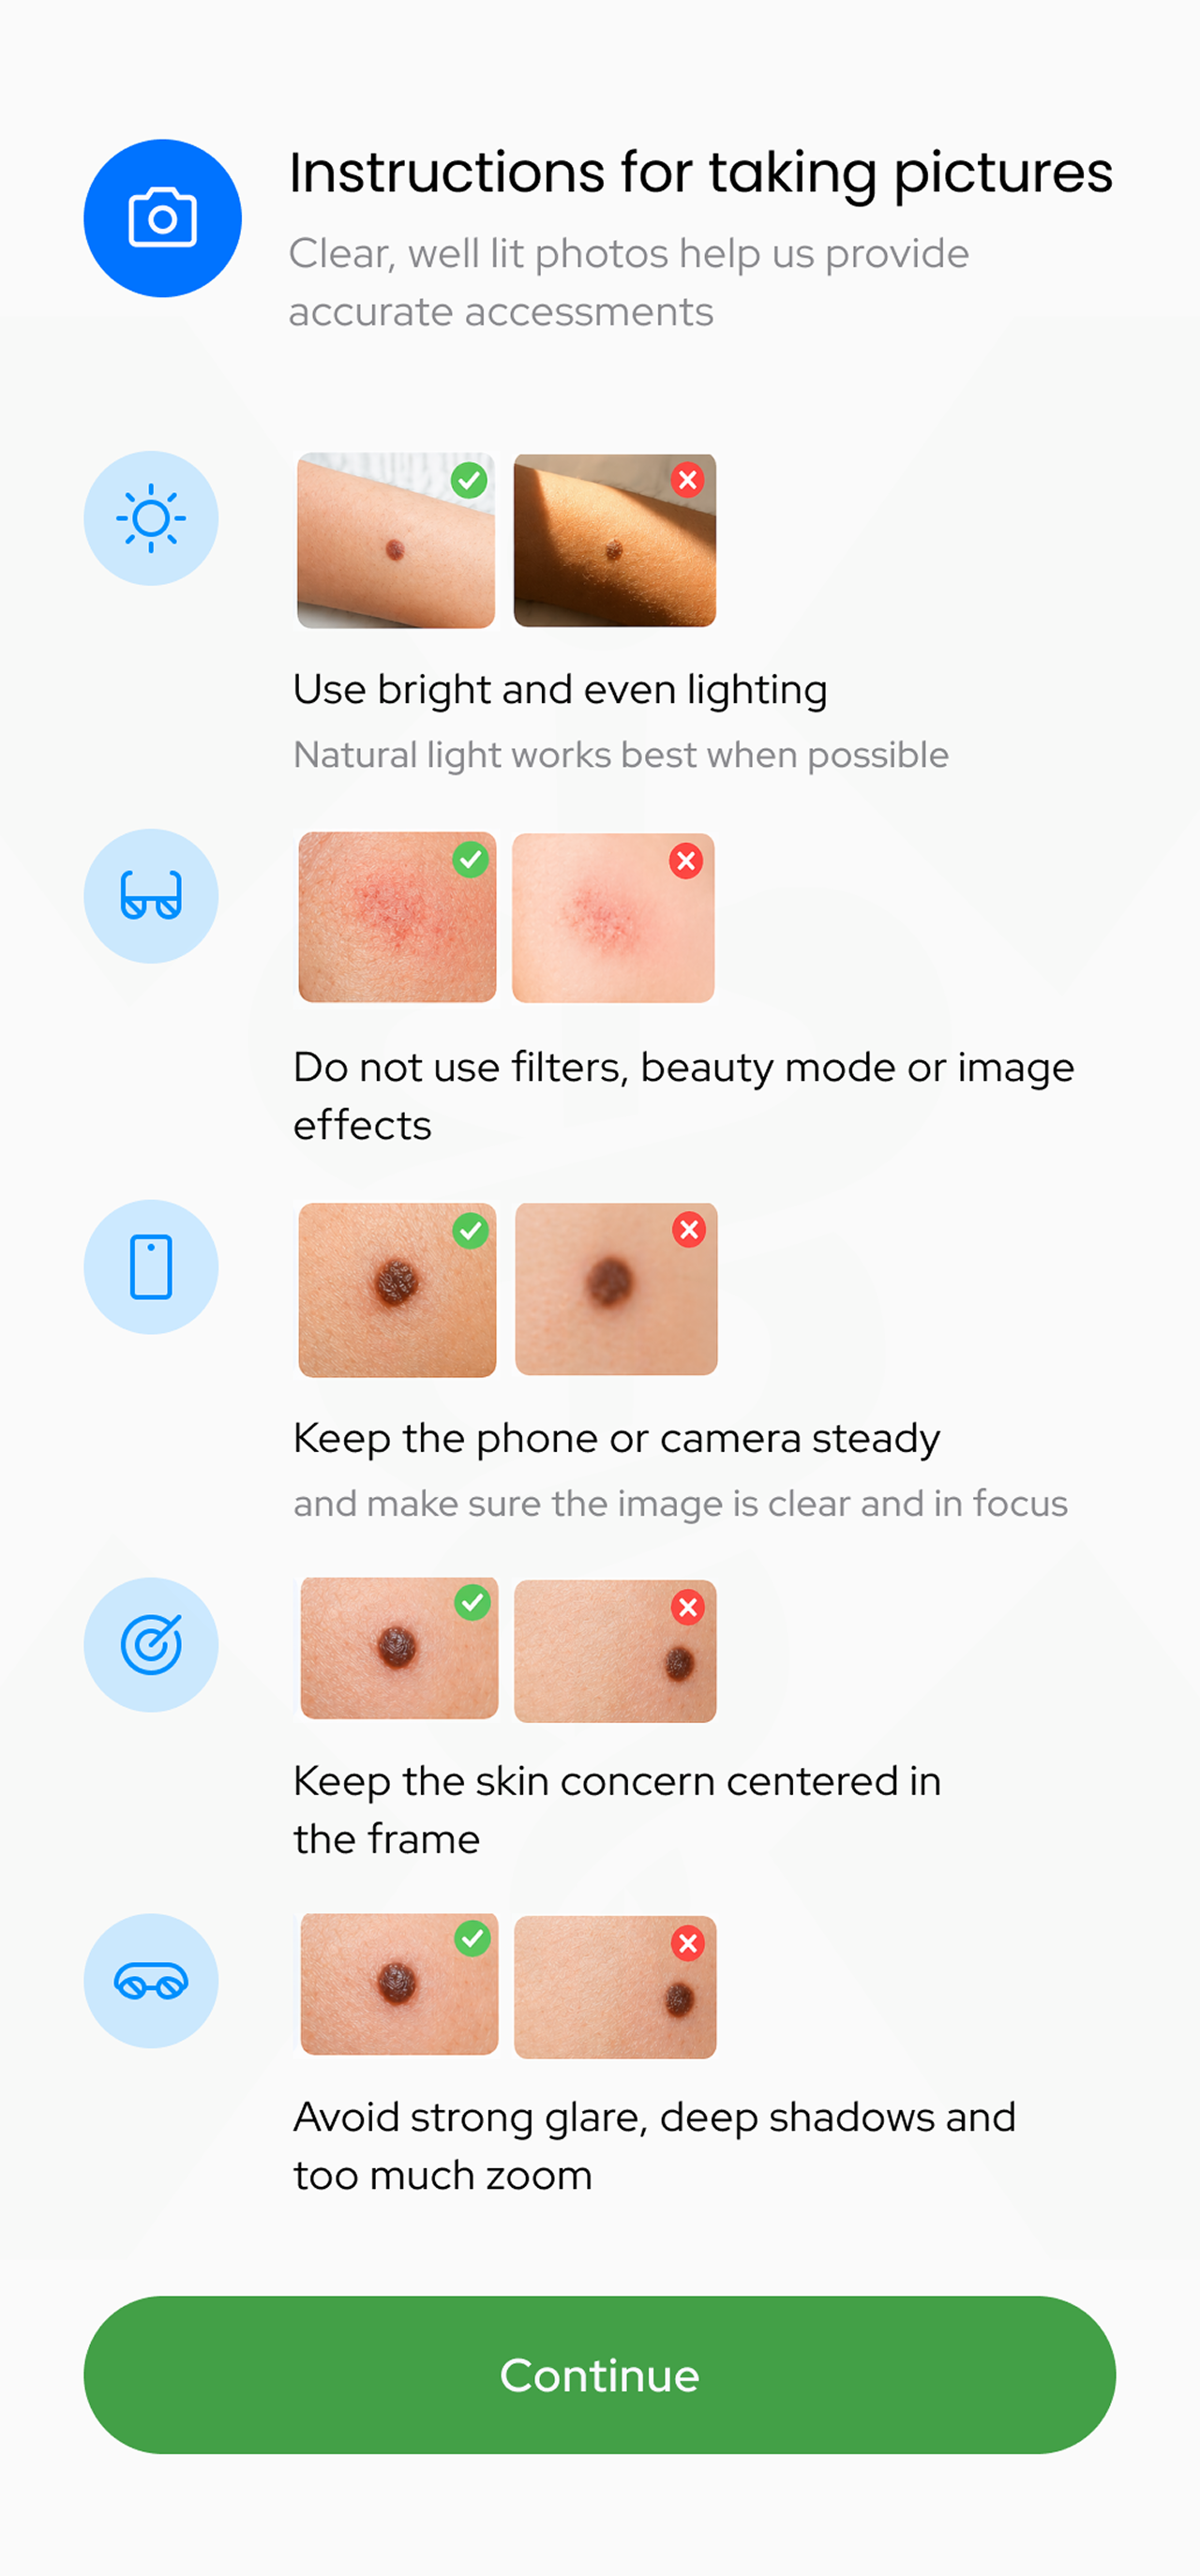
Step 3: Read through the instructions for proper guidance
Follow the instructions carefully in order to provide the best quality images to increase accuracy.
Step 4: Start the session
After reading the instructions, proceed to start the session by clicking on the "let's begin" button.
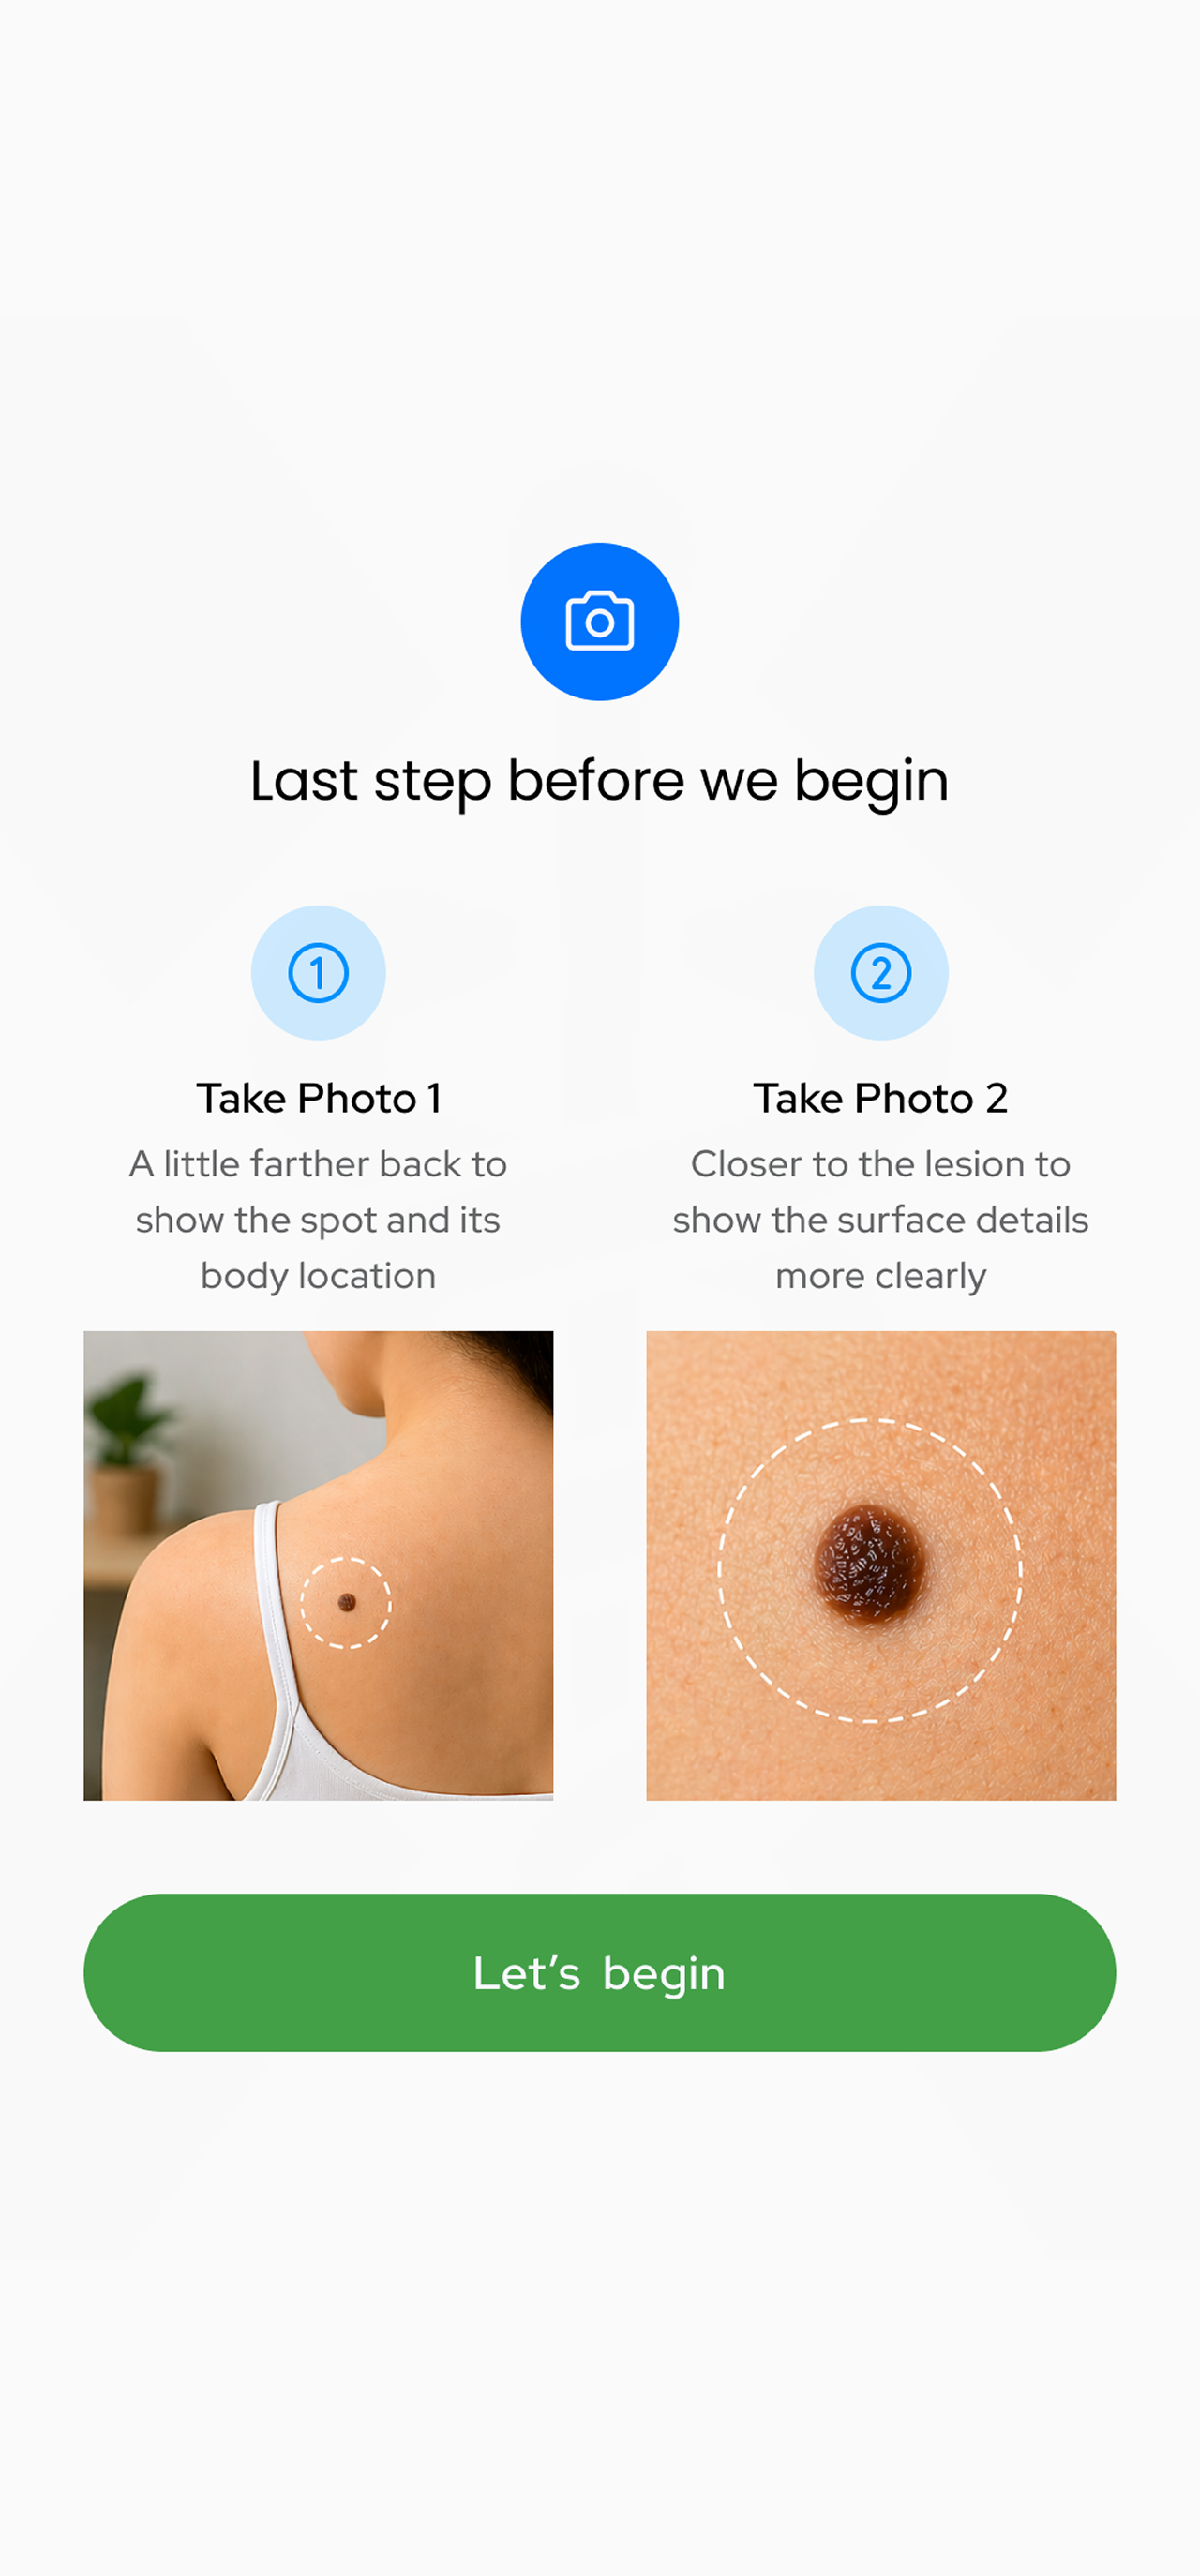
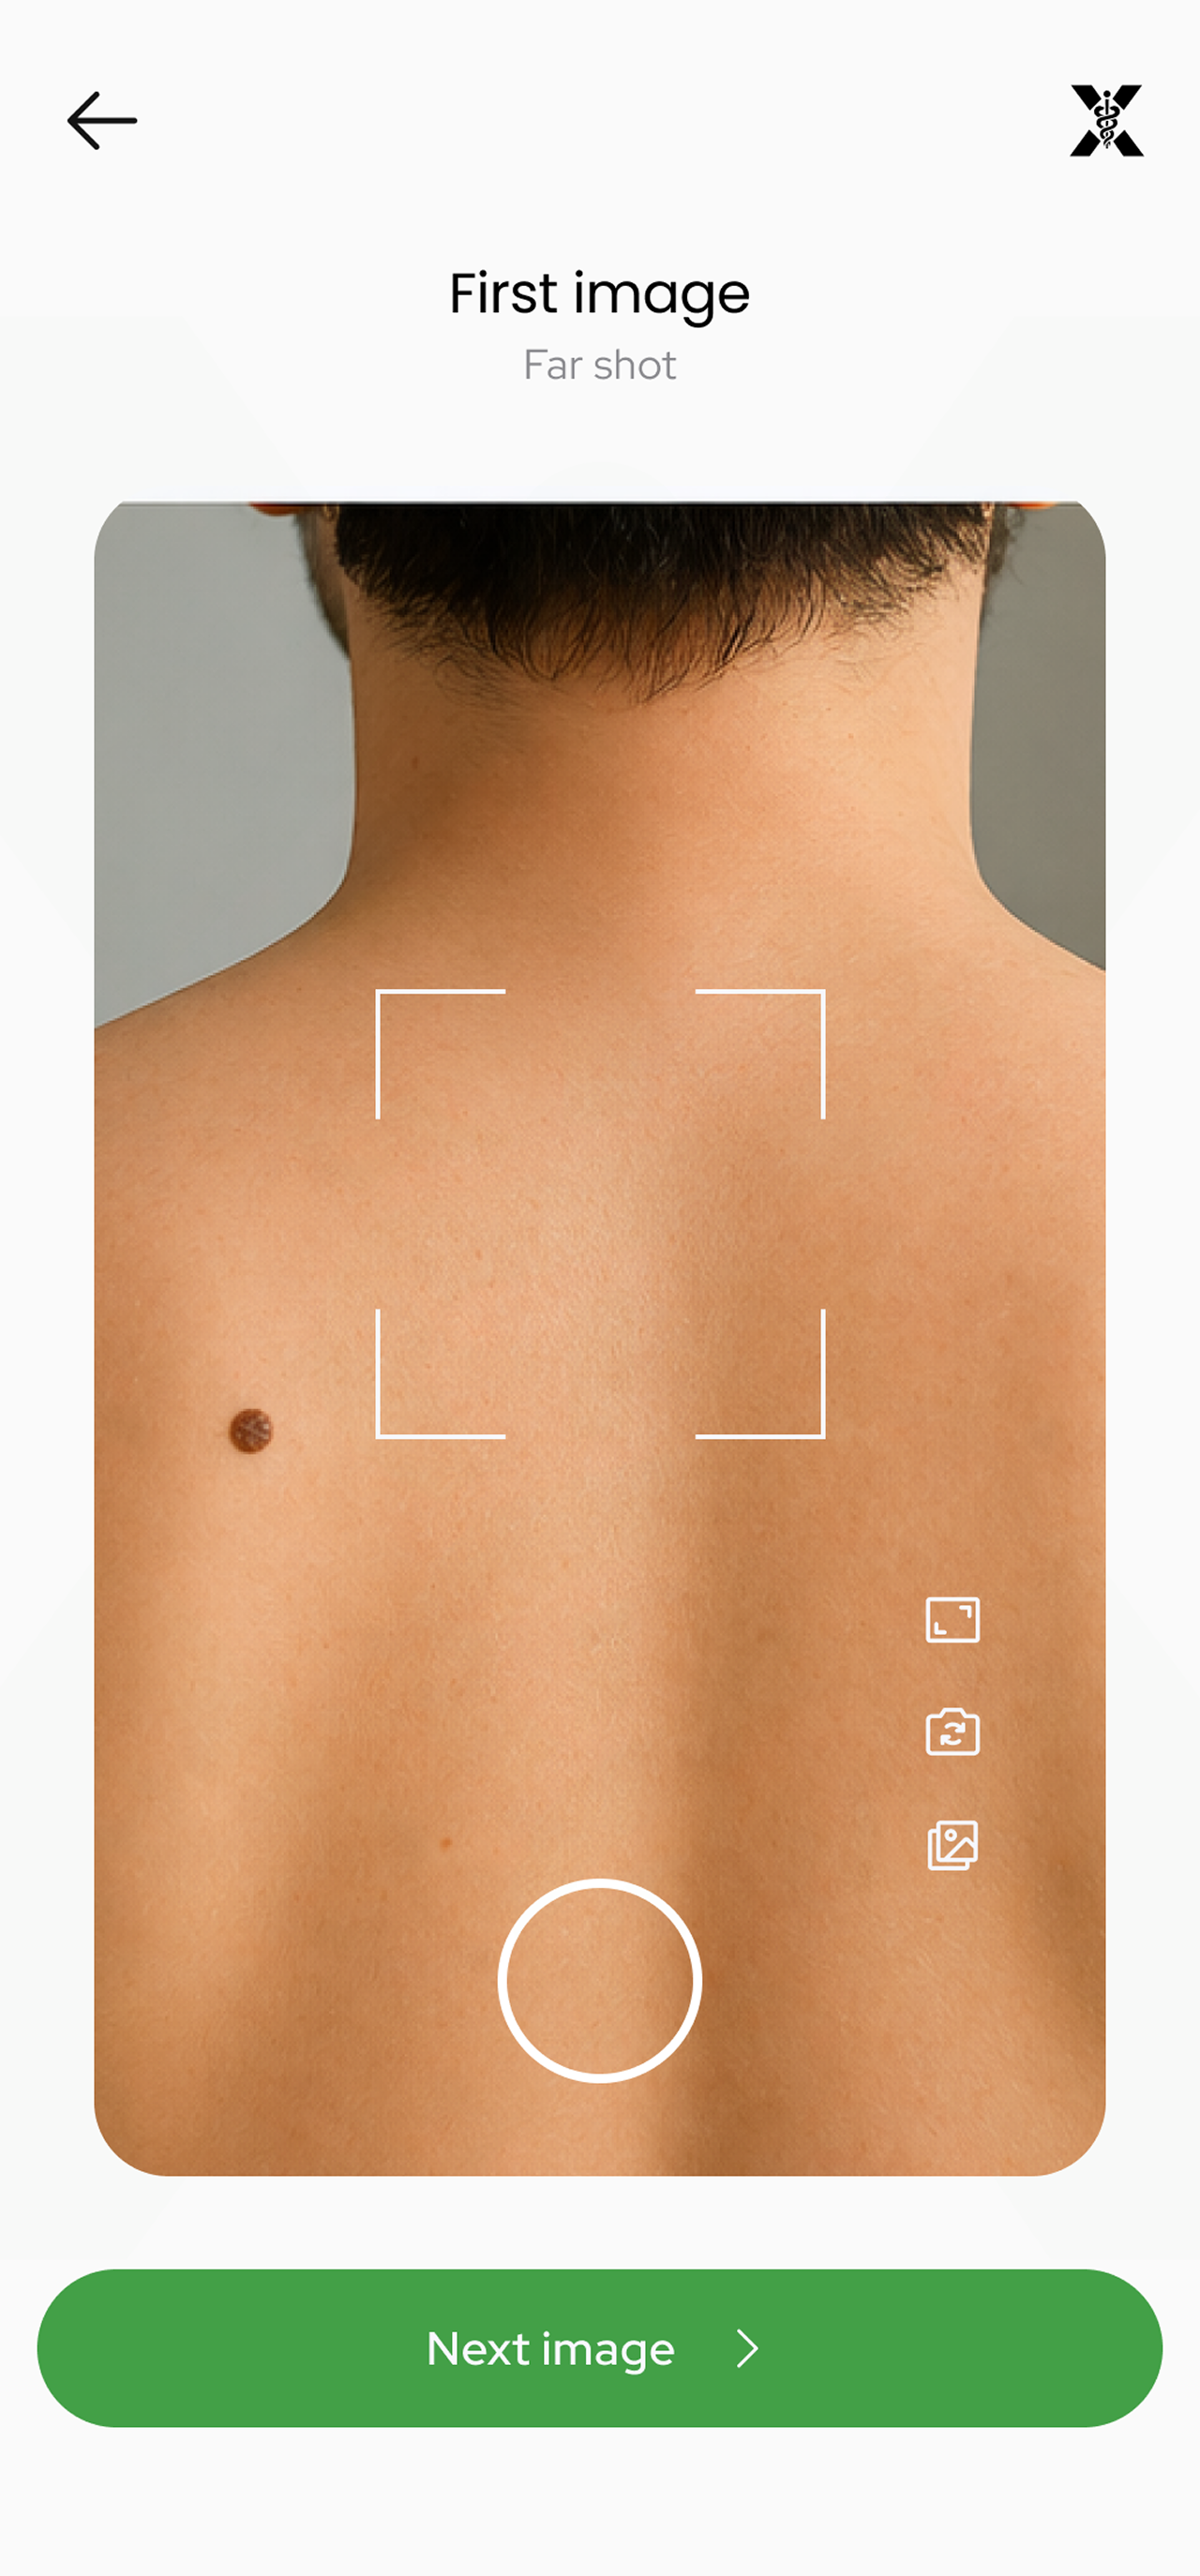
Step 5: Take the first shot
Take your first image following the instructions carefully; this first image is a far shot of the affected skin area. After taking the picture click on the "next image" to proceed.
N/B: you can also upload a skin to stage 1 if tested for first time use.
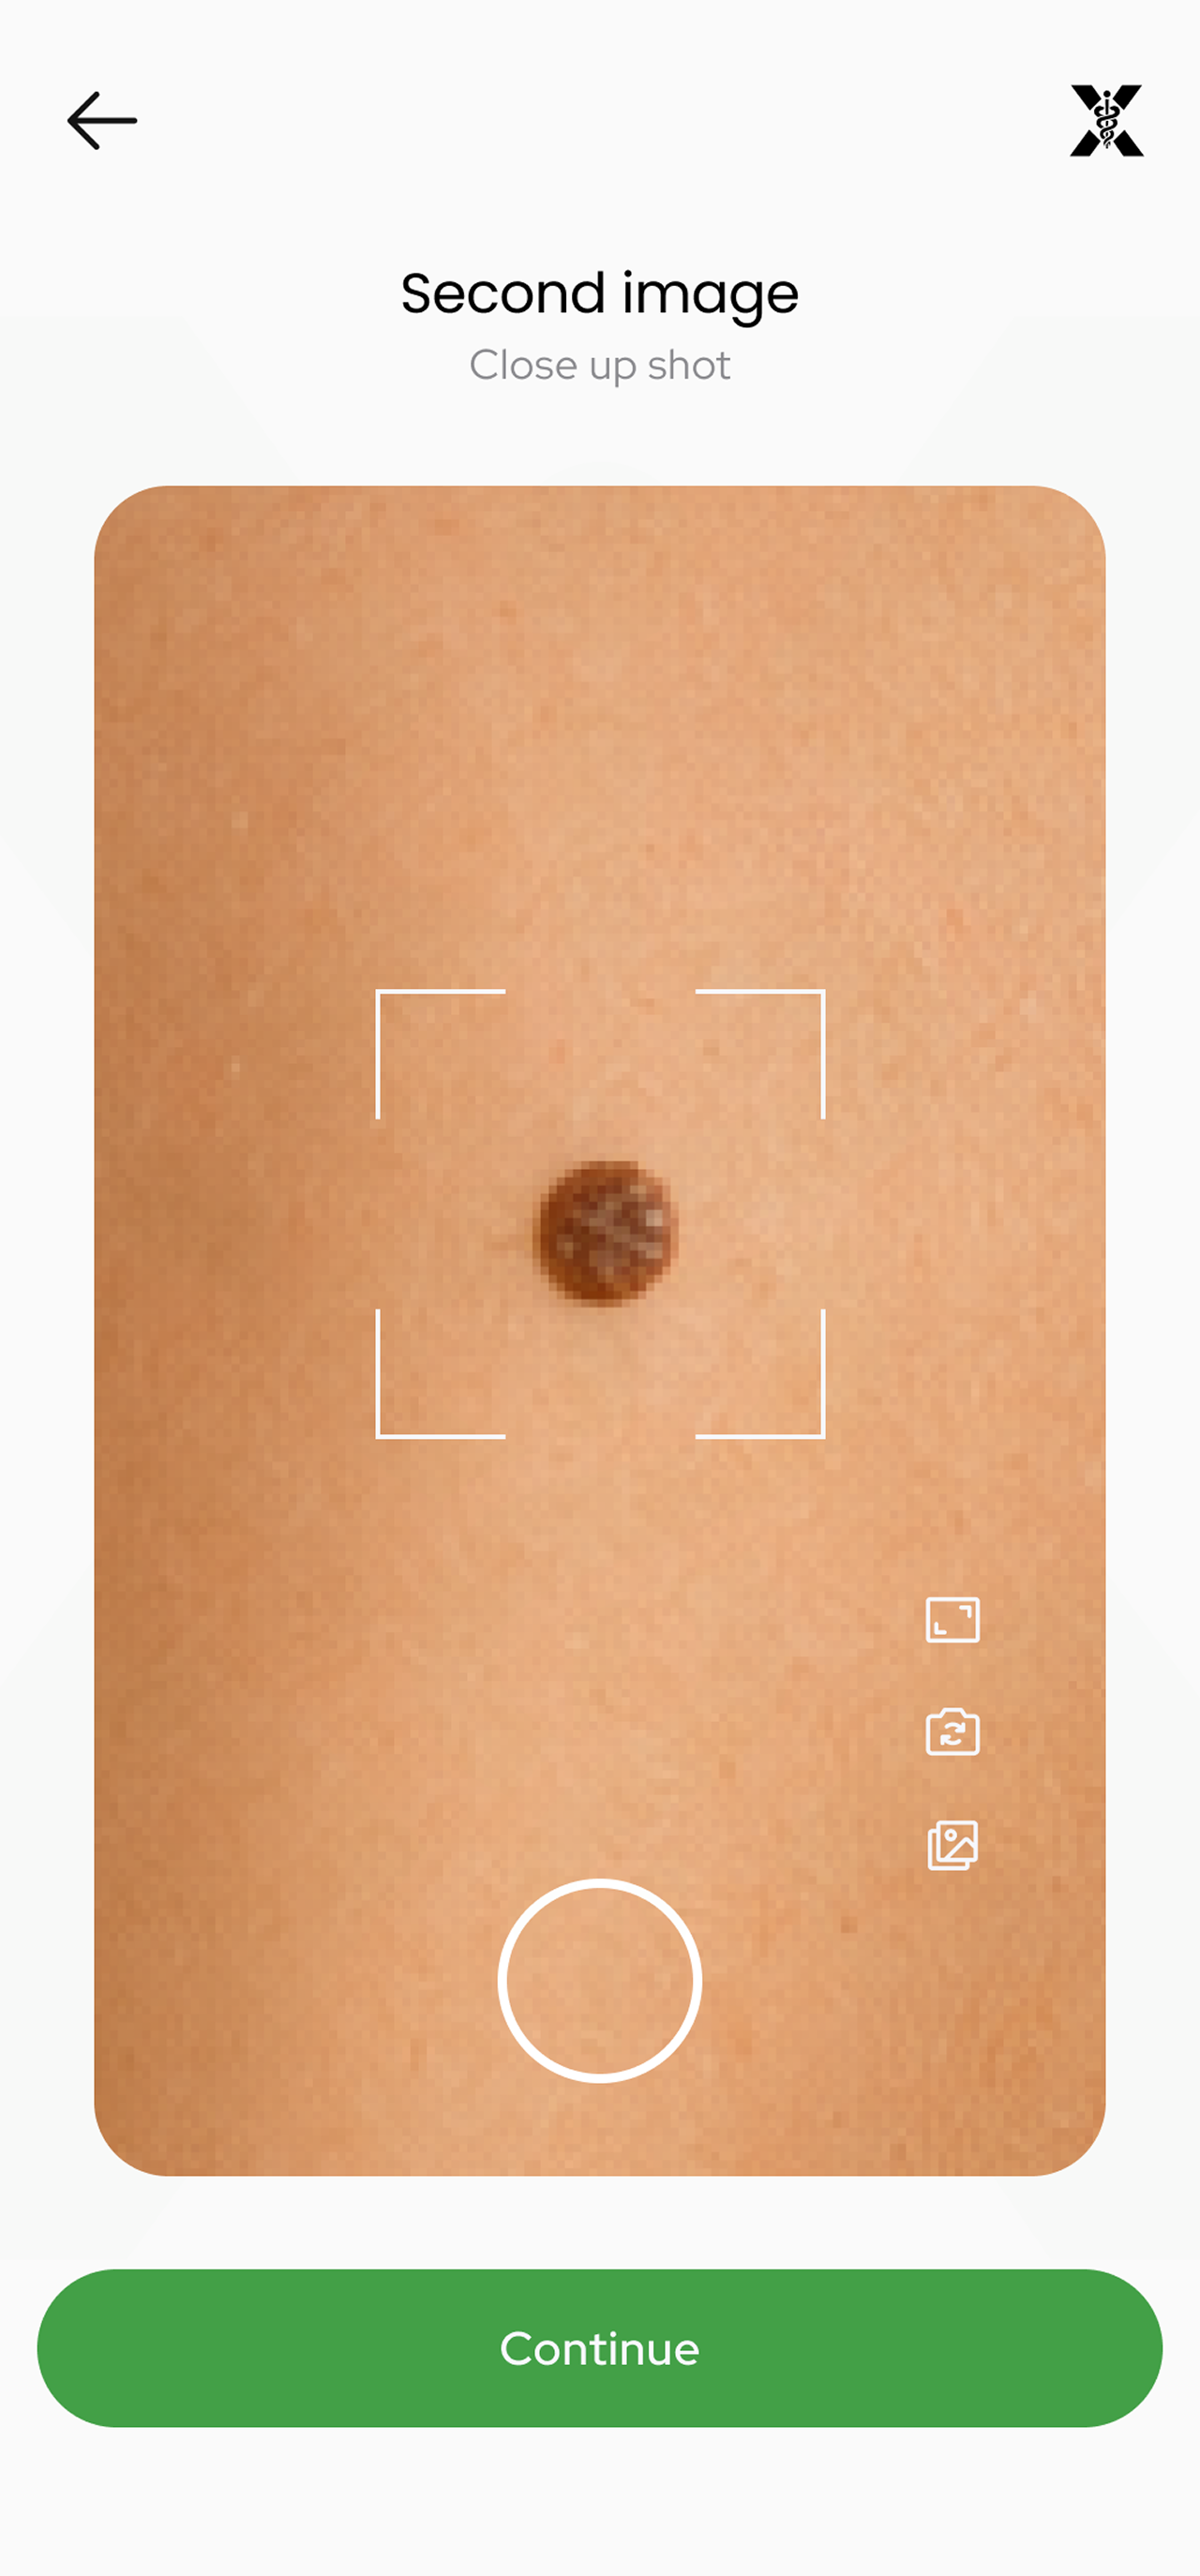
Step 6: Take the second shot
Take your second image following the instructions carefully; this second image is a close-up shot of the affected skin area. After taking the picture click on "continue" to proceed.
N/B: you can also upload a skin to stage 2 if tested for first time use.
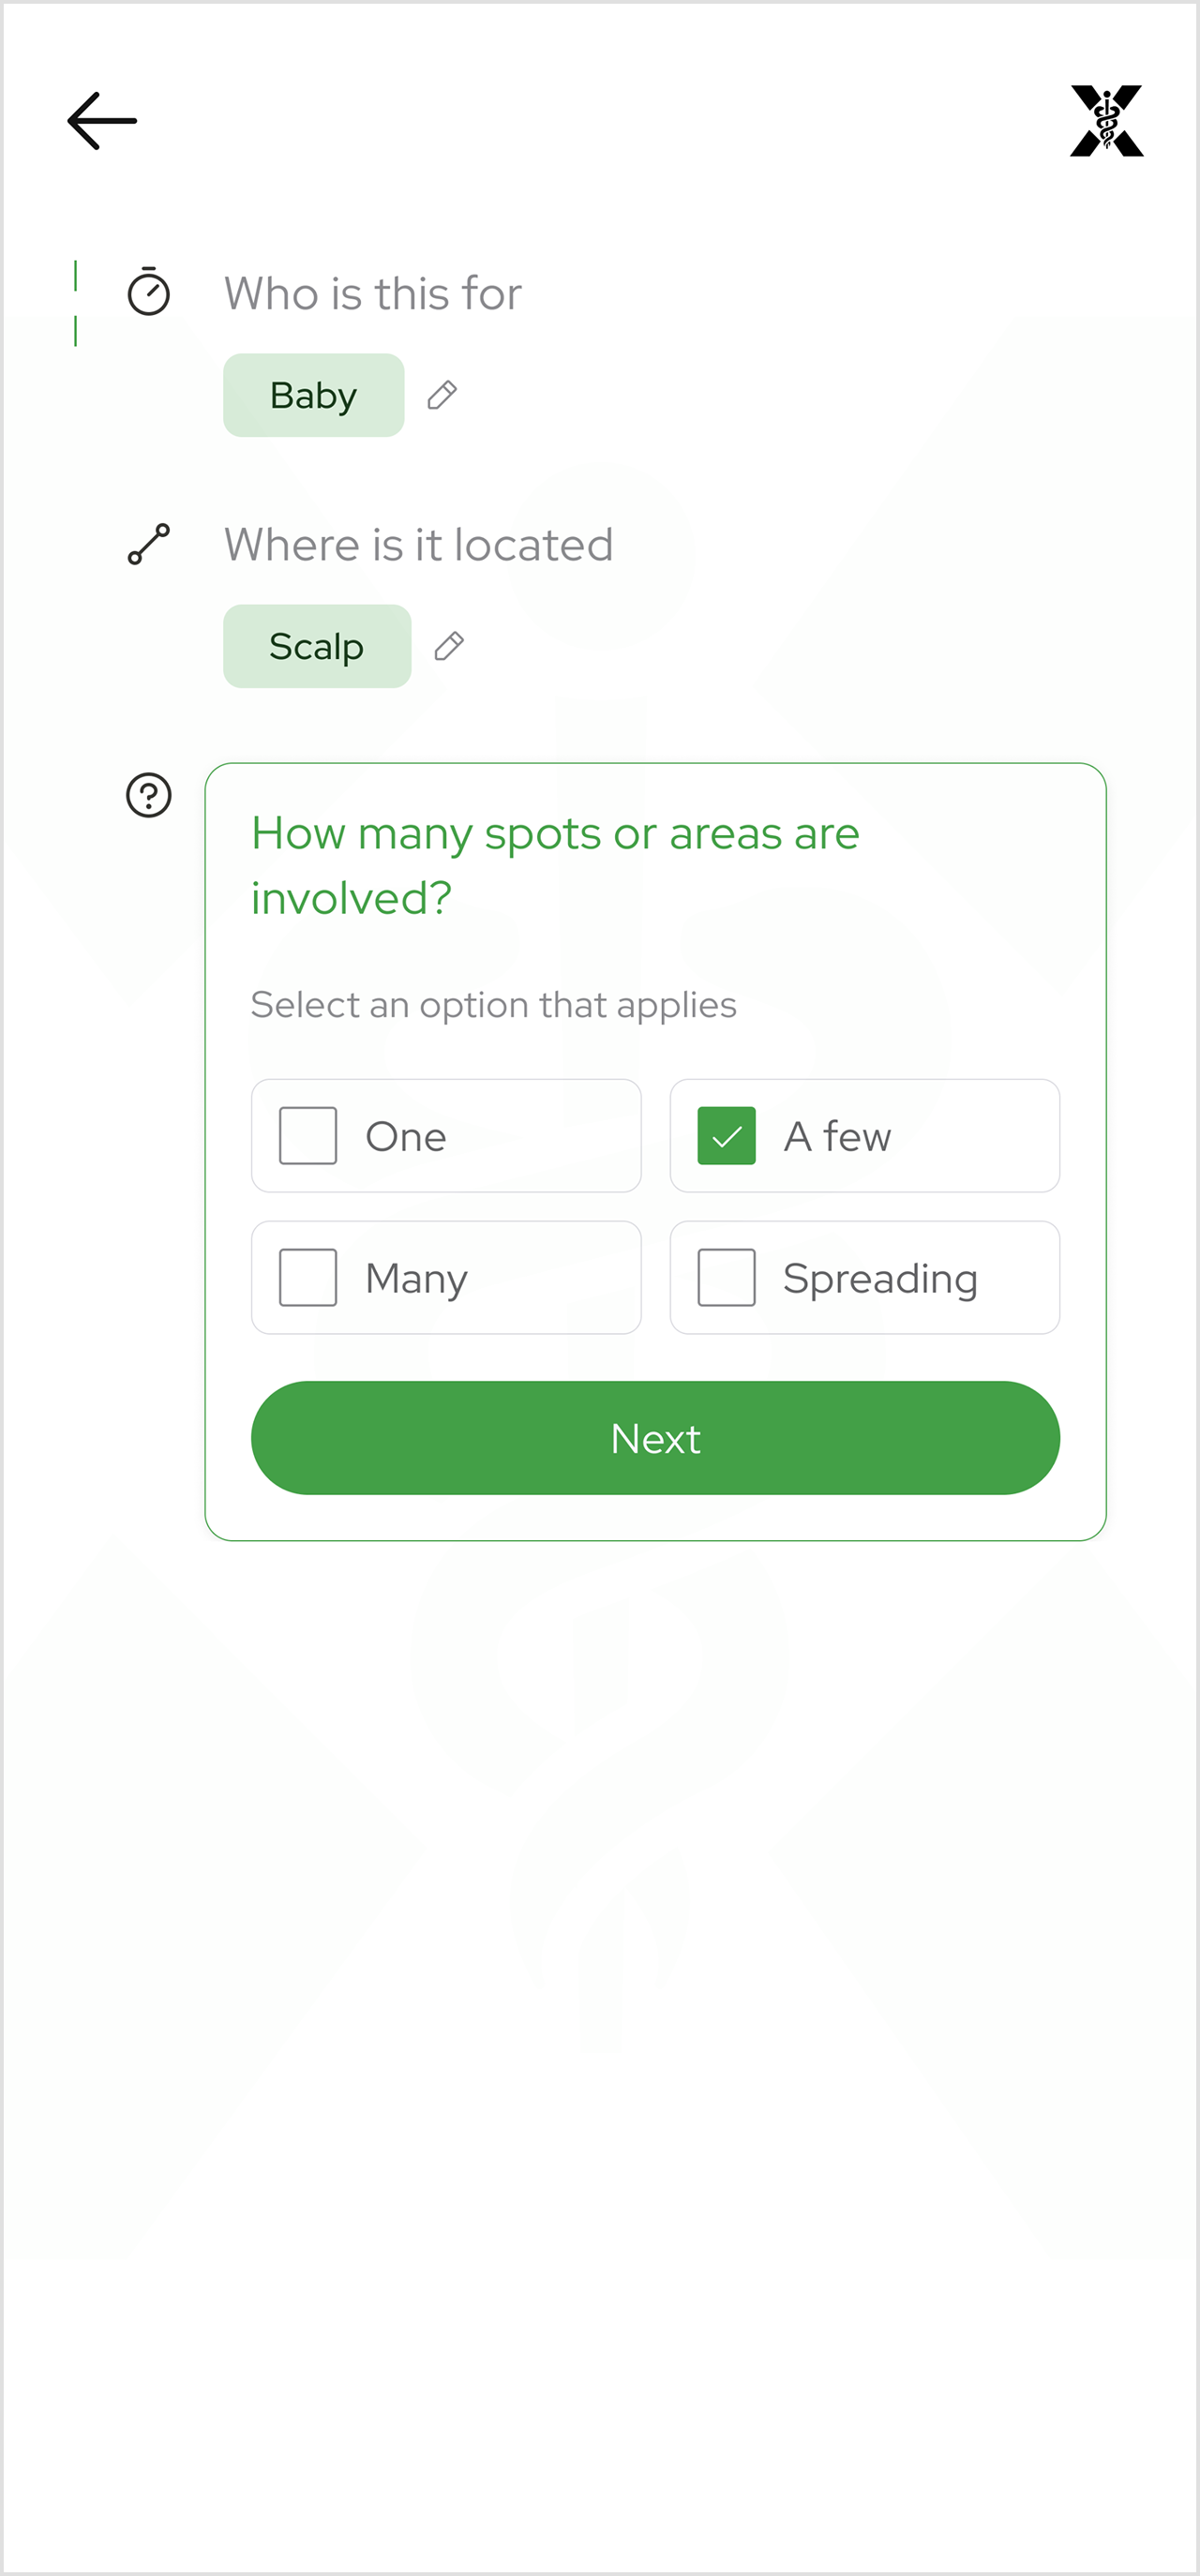
Step 7: Answer the follow up questions accurately
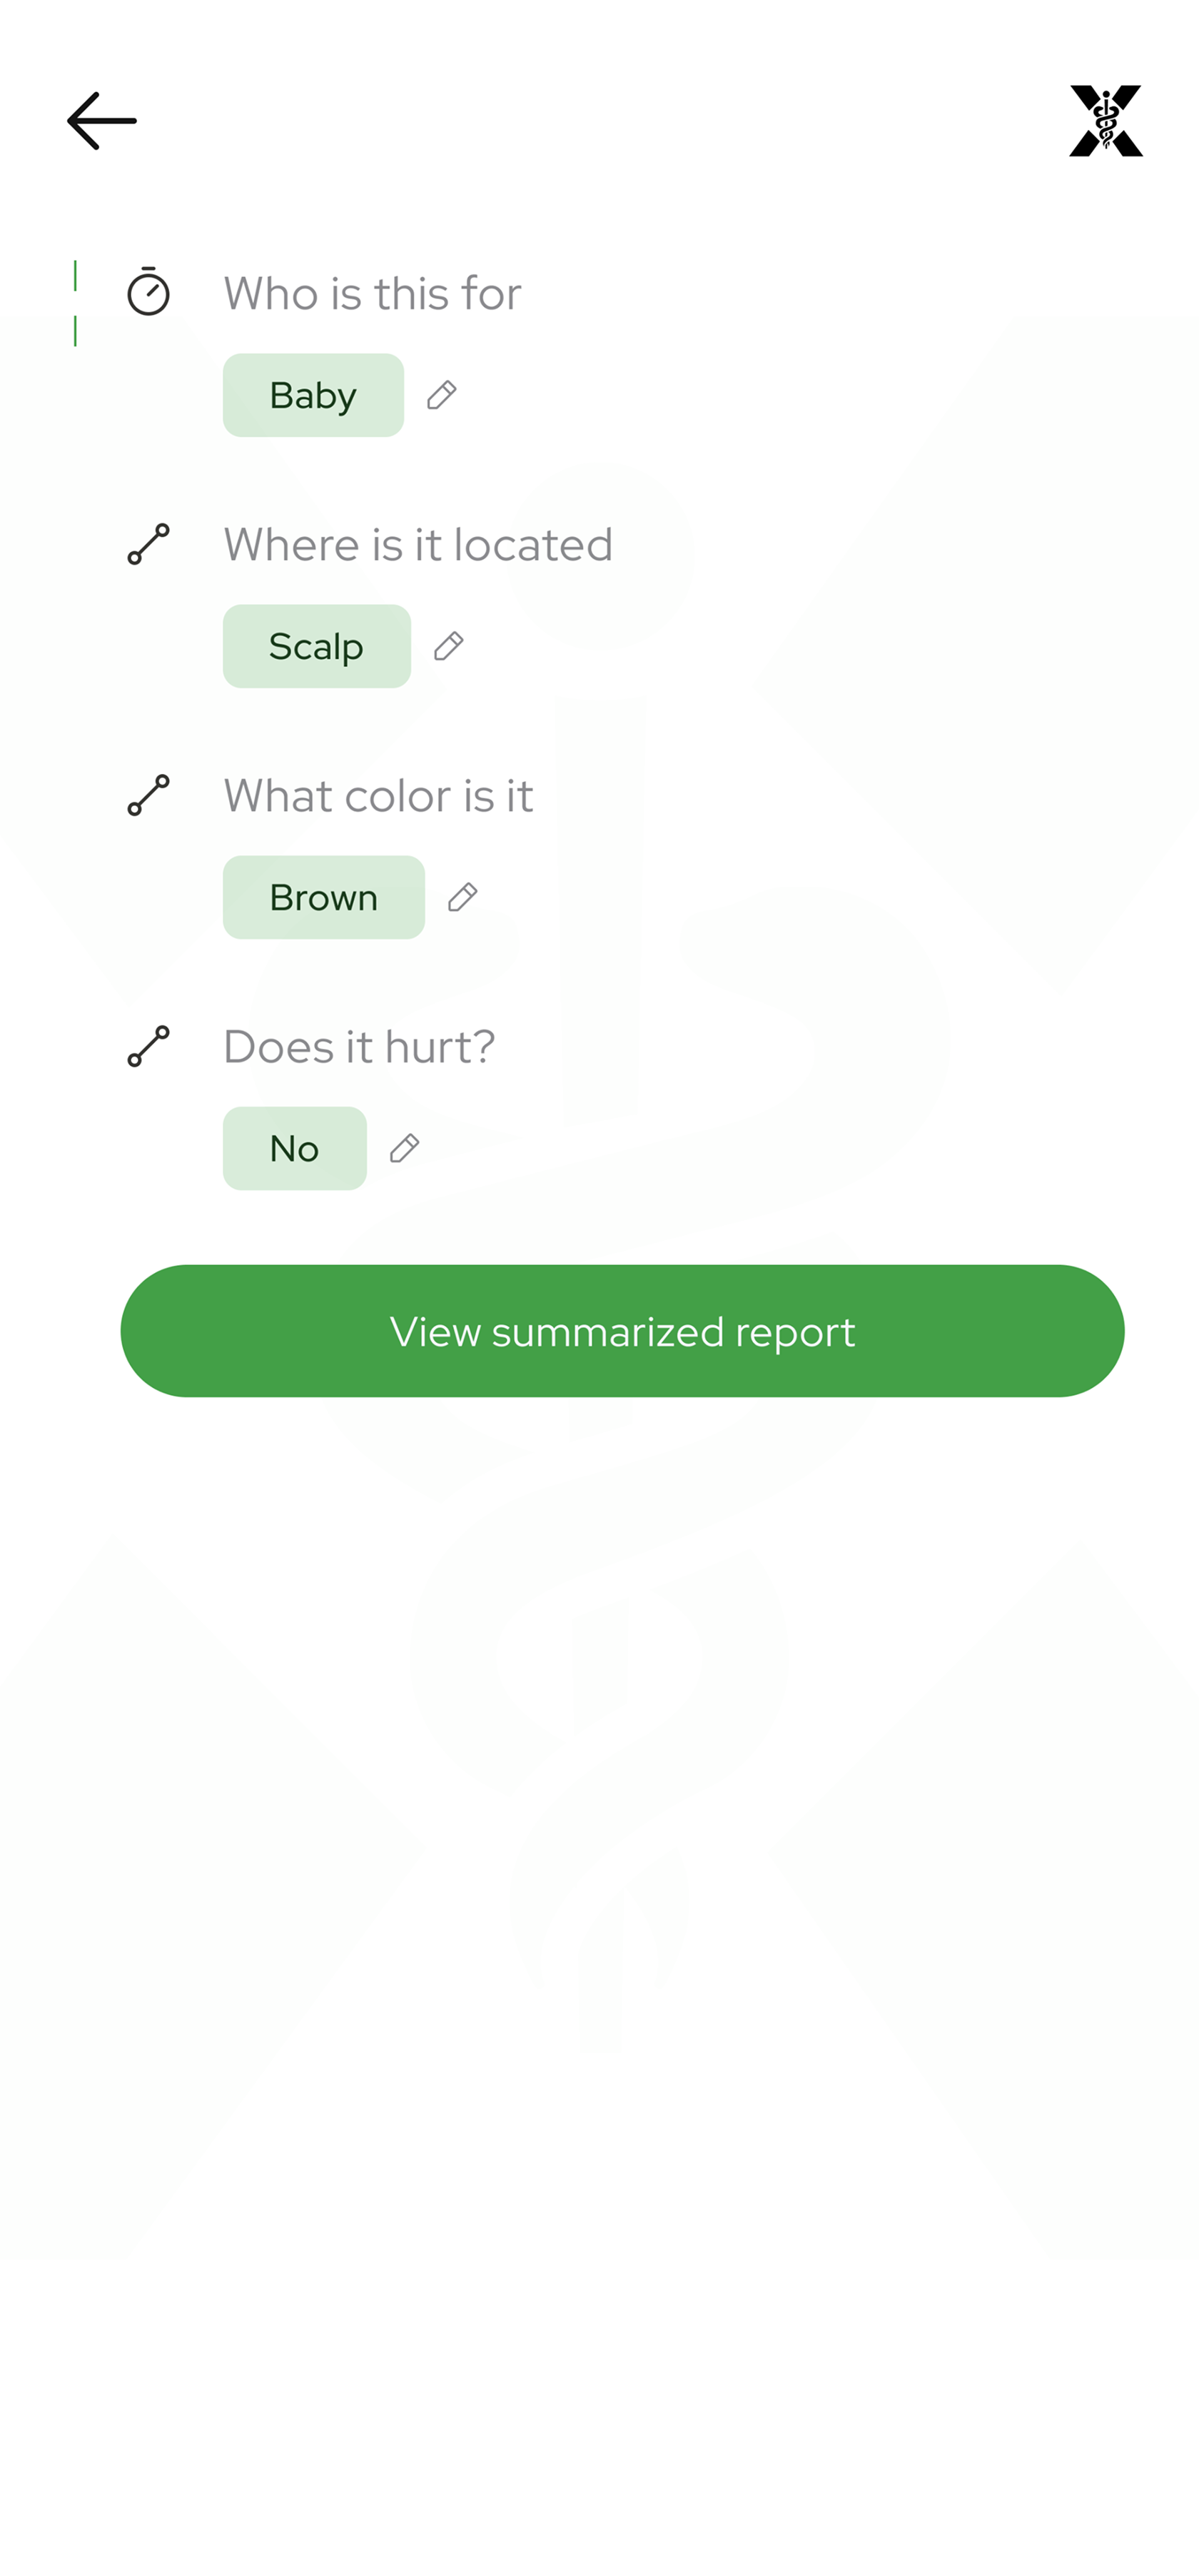
A few questions will be asked to properly understand the context of the images uploaded.
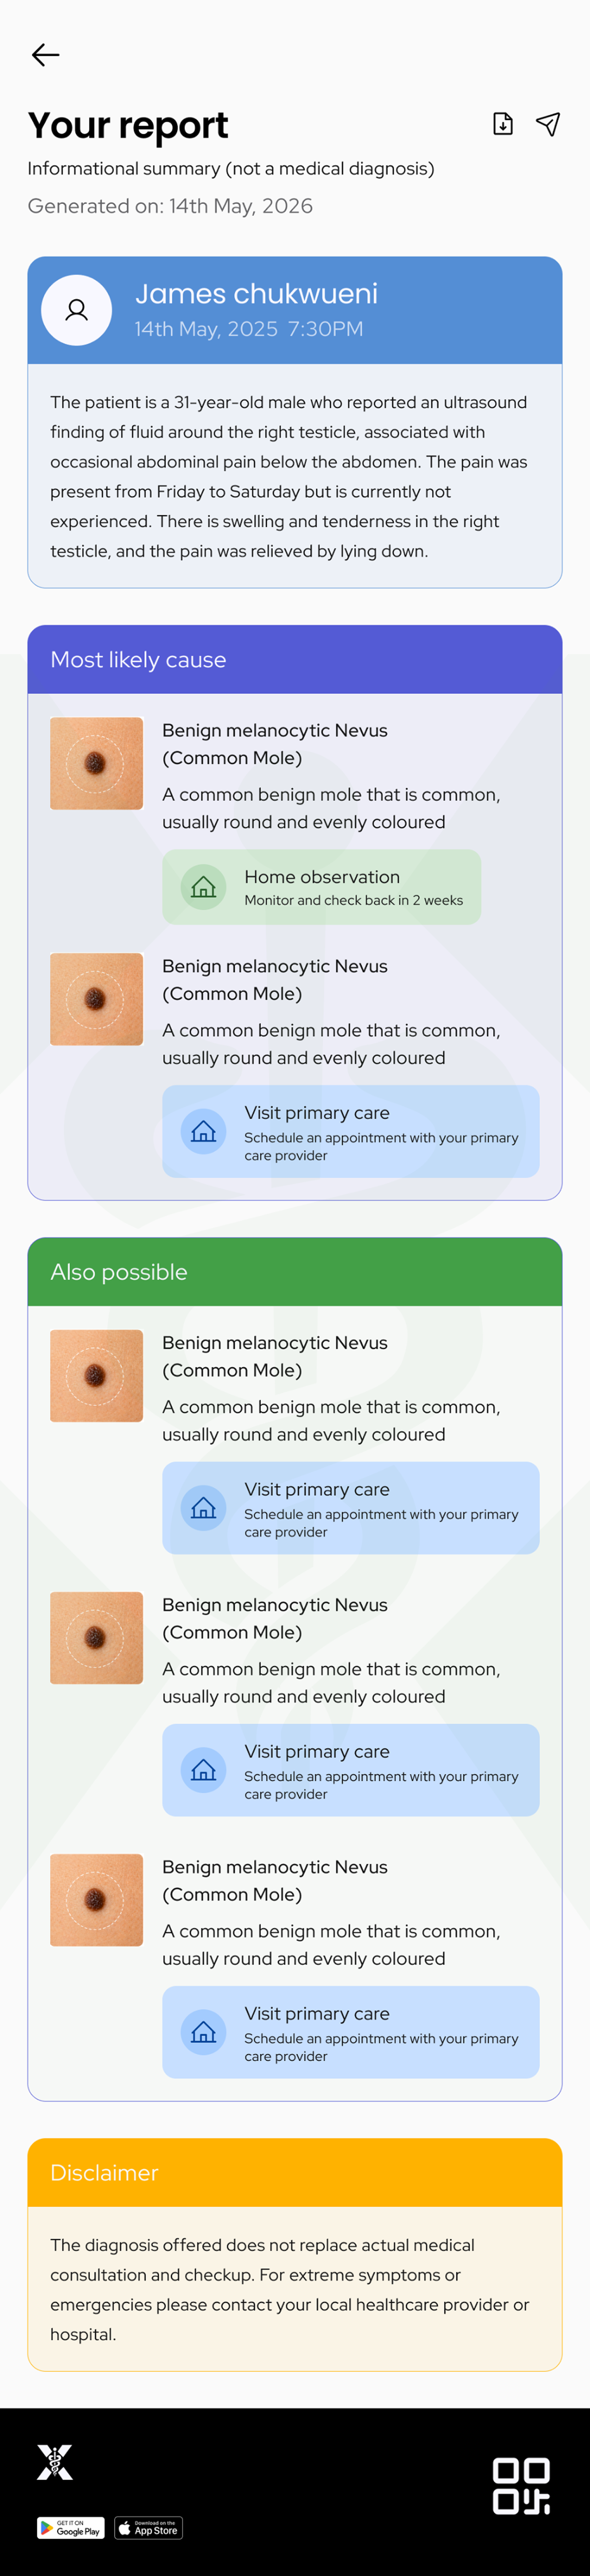
Step 8: View result from the session
At the end of the session, a view result button will be available and clicking on it leads to the result page.
Ending a session
A session on skin scanner stops automatically after the proper number of questions have been answered and the algorithm affirms that a proper symptom has been noticed.
Resuming a session
If a session is left or exited before a summary report is generated, the session is kept active till you revisit it for continuation. Follow the steps below to resume an active session.
Step 1: Access Skin Scanner
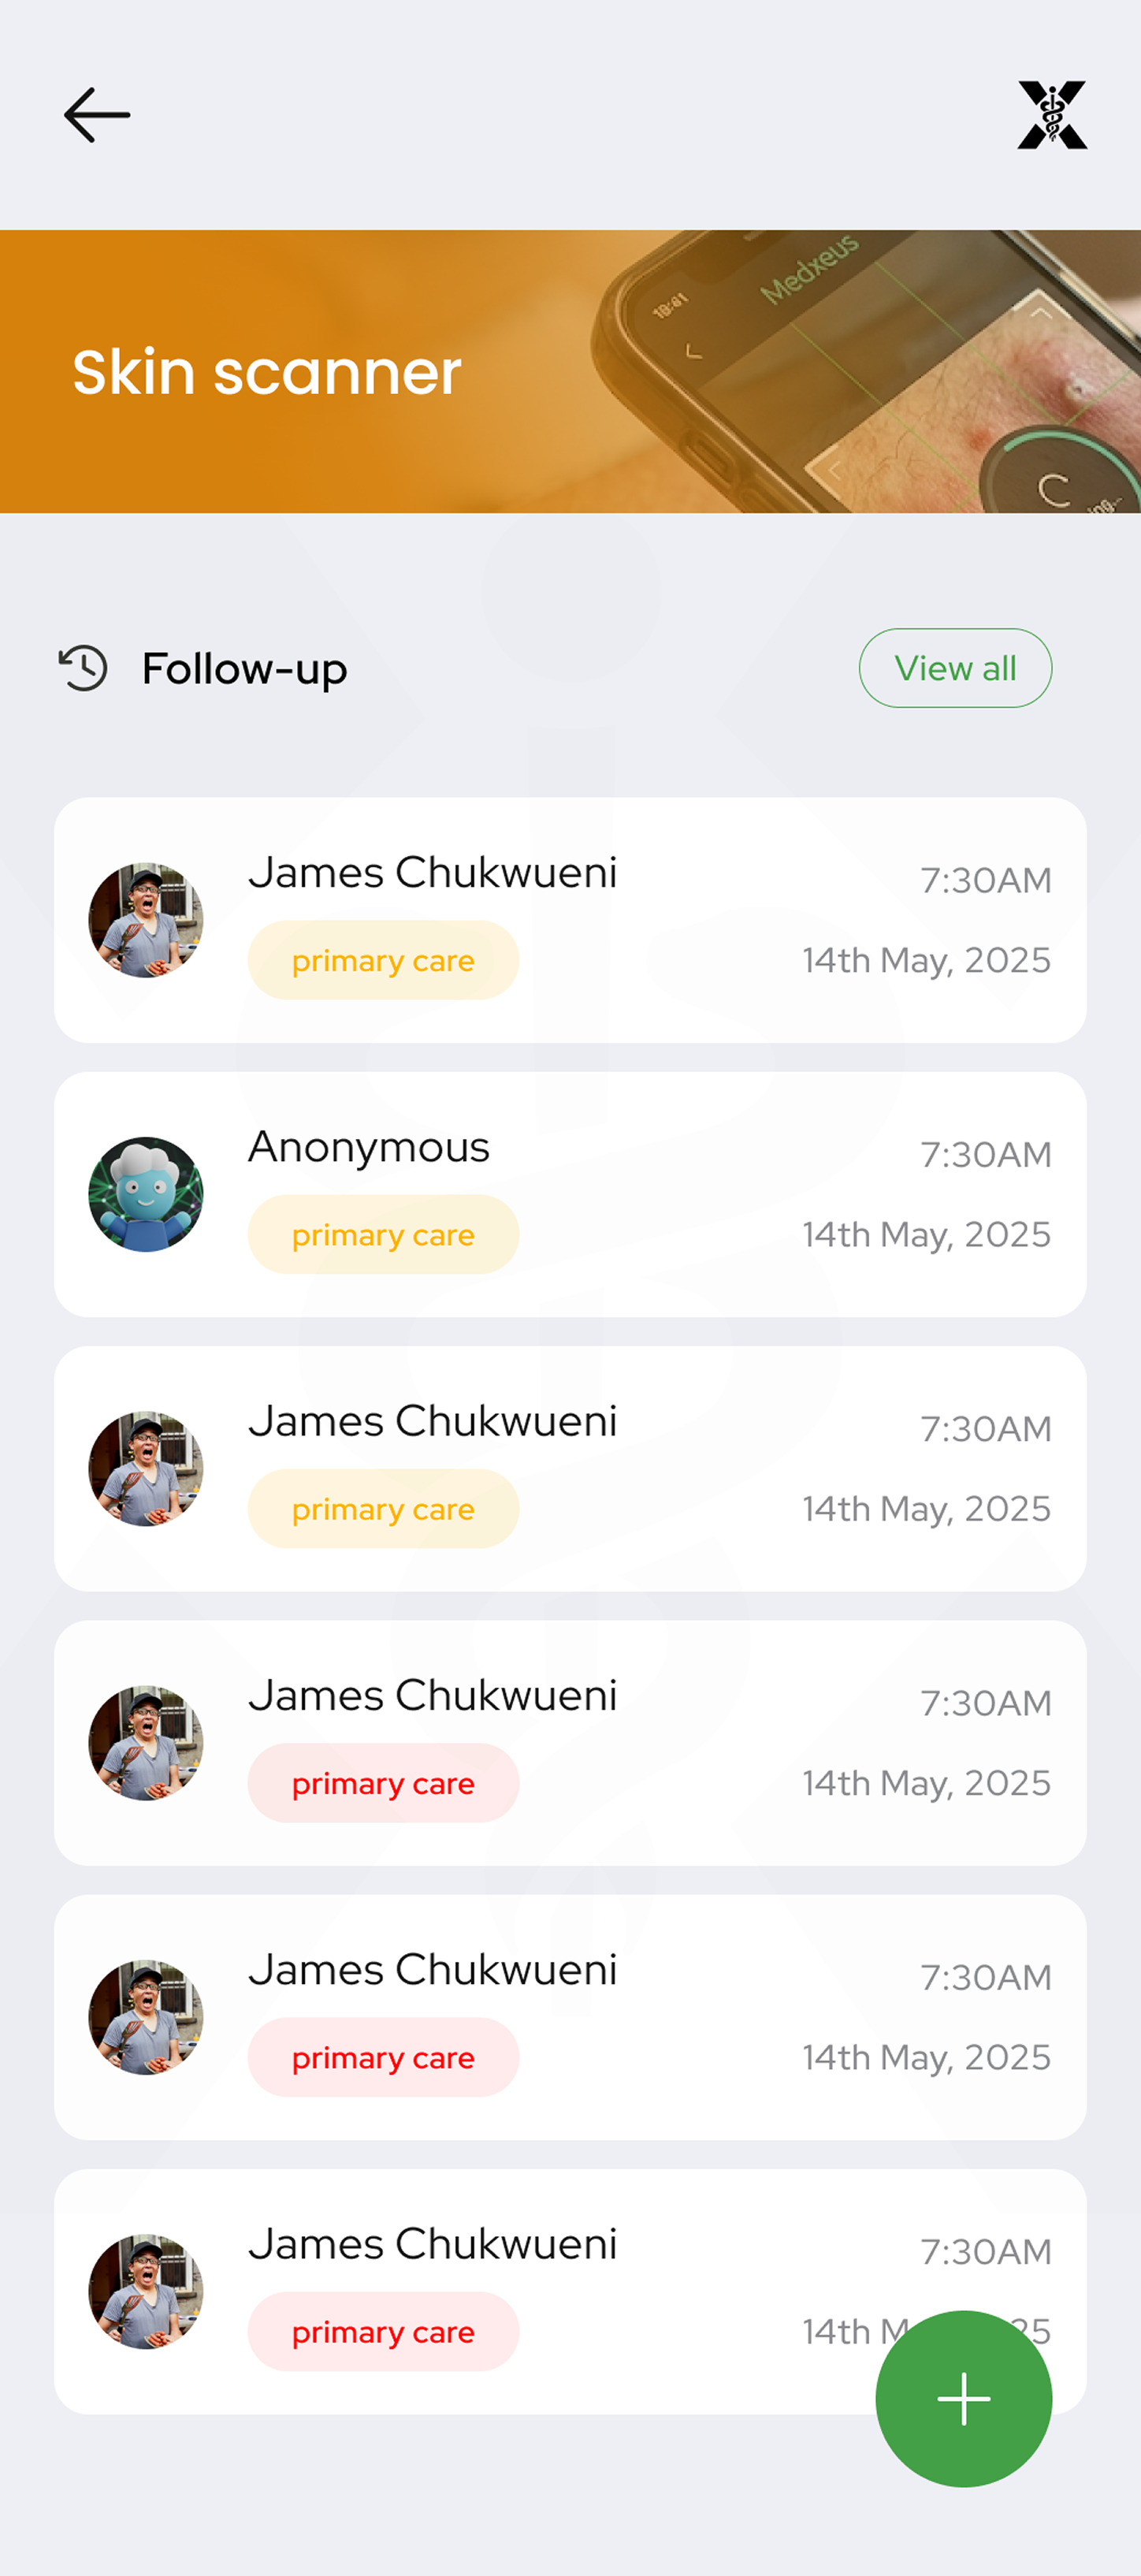
Navigate to the homepage within the app, click on the skin scanner card.
Step 2: Find the session
Scroll through the history screen to find the active sessions, they will be tagged with "ongoing". Click on the session to resume it.
How to start a session
Follow the step-by-step process to begin a Theraxeus session
Step 1: Click on the Theraxeus card
Navigate to the homepage within the app, click on the Theraxeus card to access the section.
Step 2: Setup privacy pin
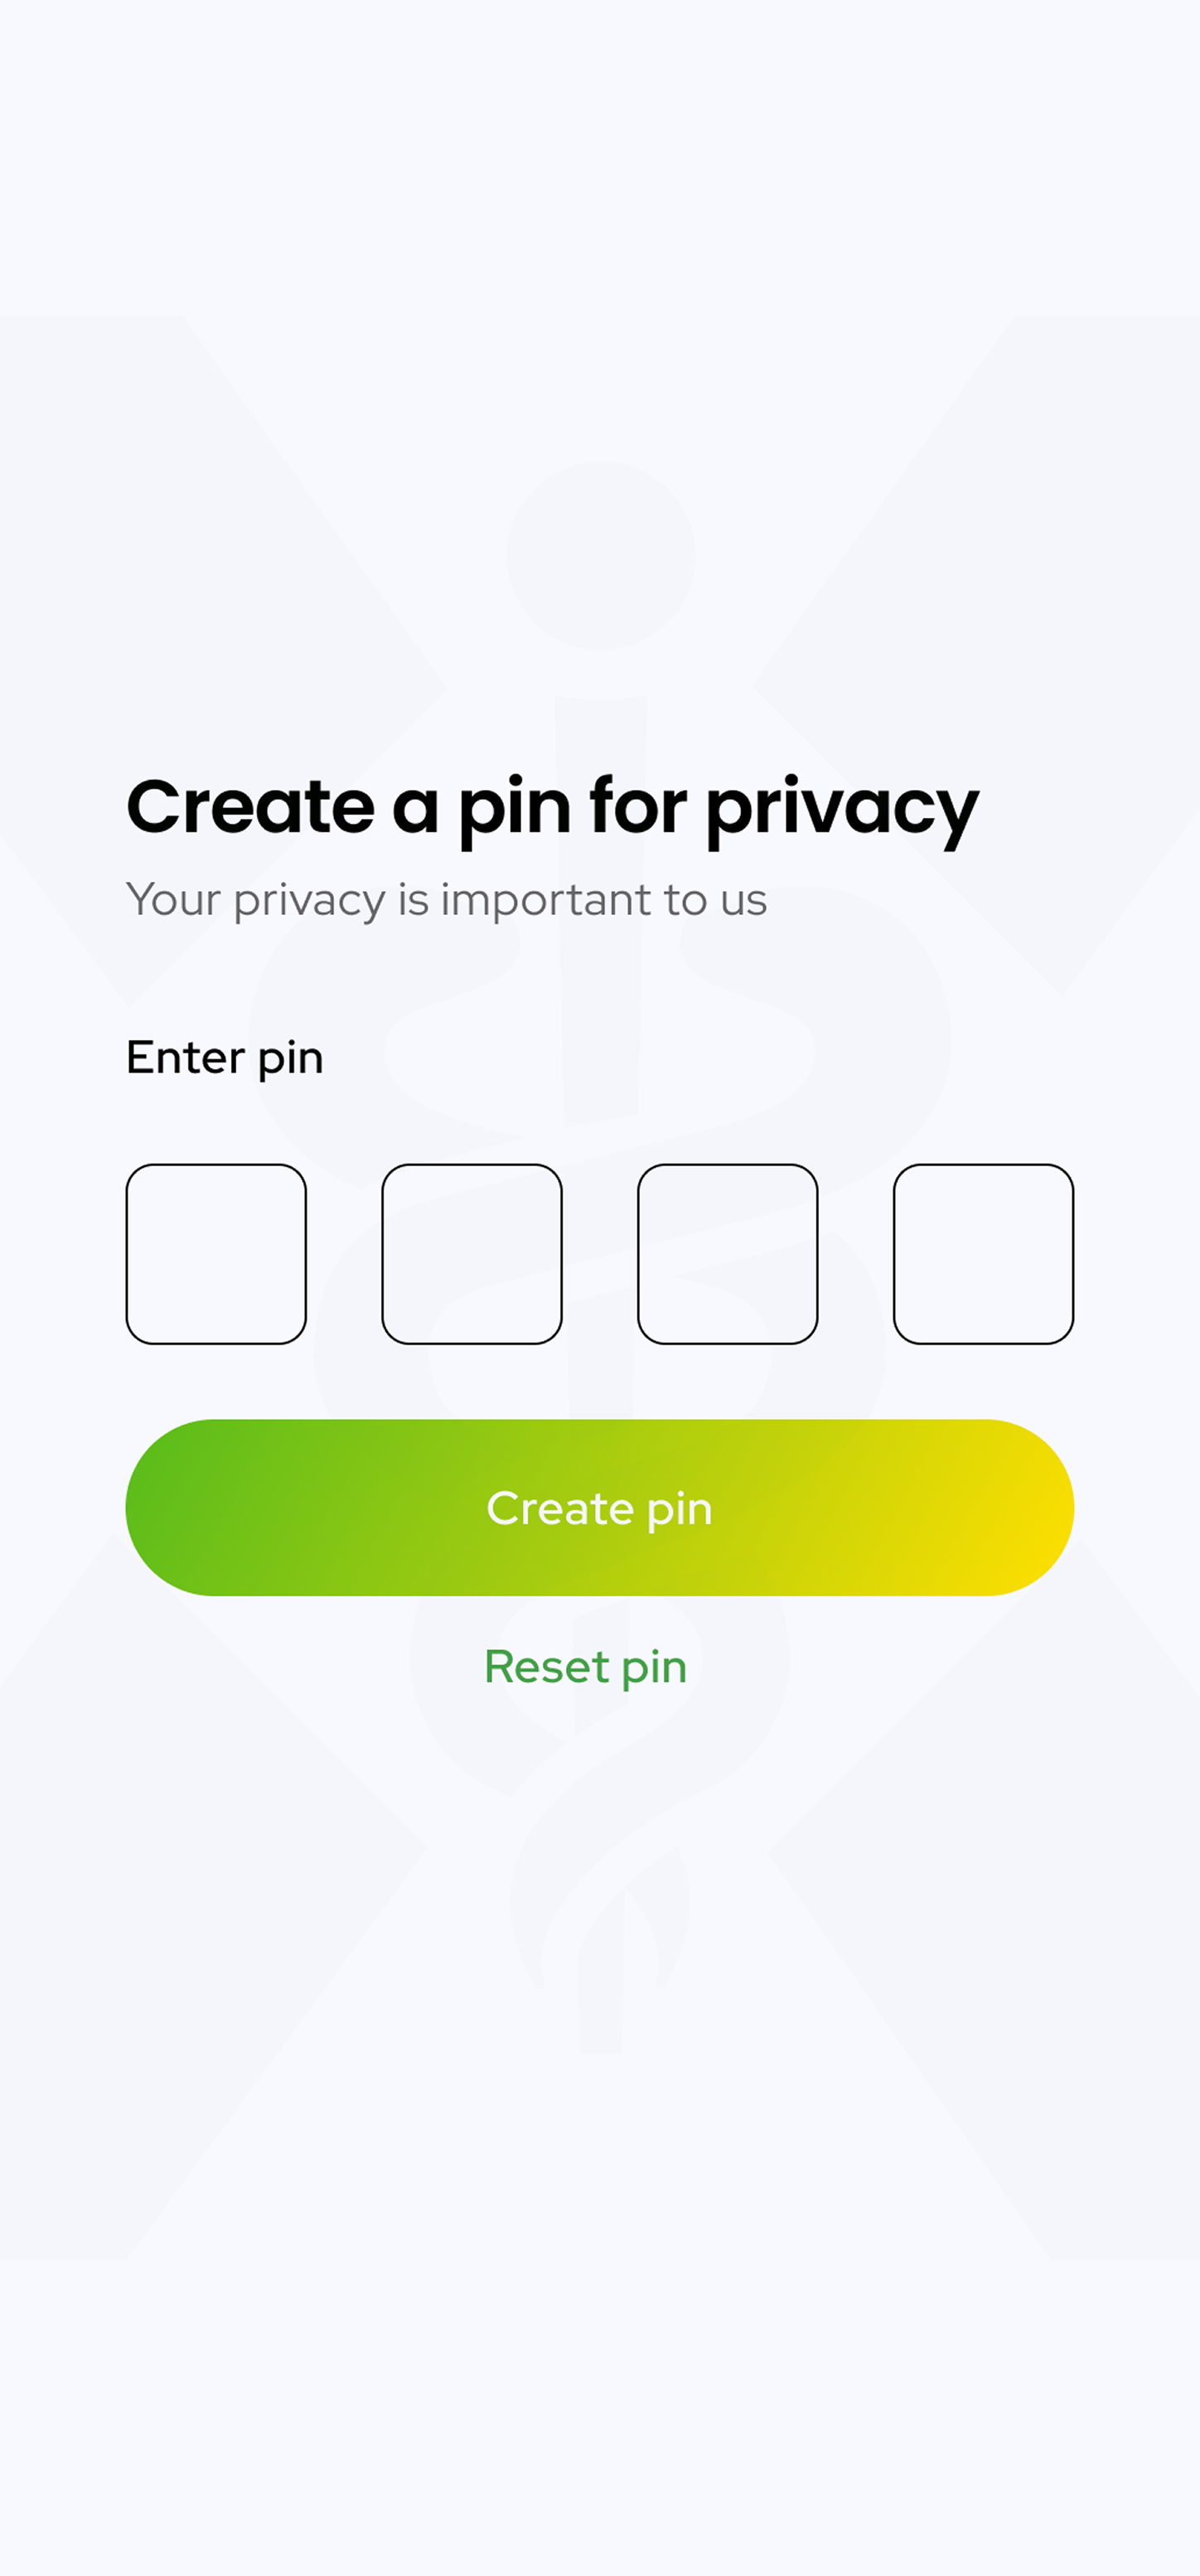
Due to the sensitive nature of your therapy sessions, a privacy pin is required to protect your session history and conversations. Set up the 4-digit pin with easy to remember digits (supports only numeric digits).
Step 3: Theraxeus homepage
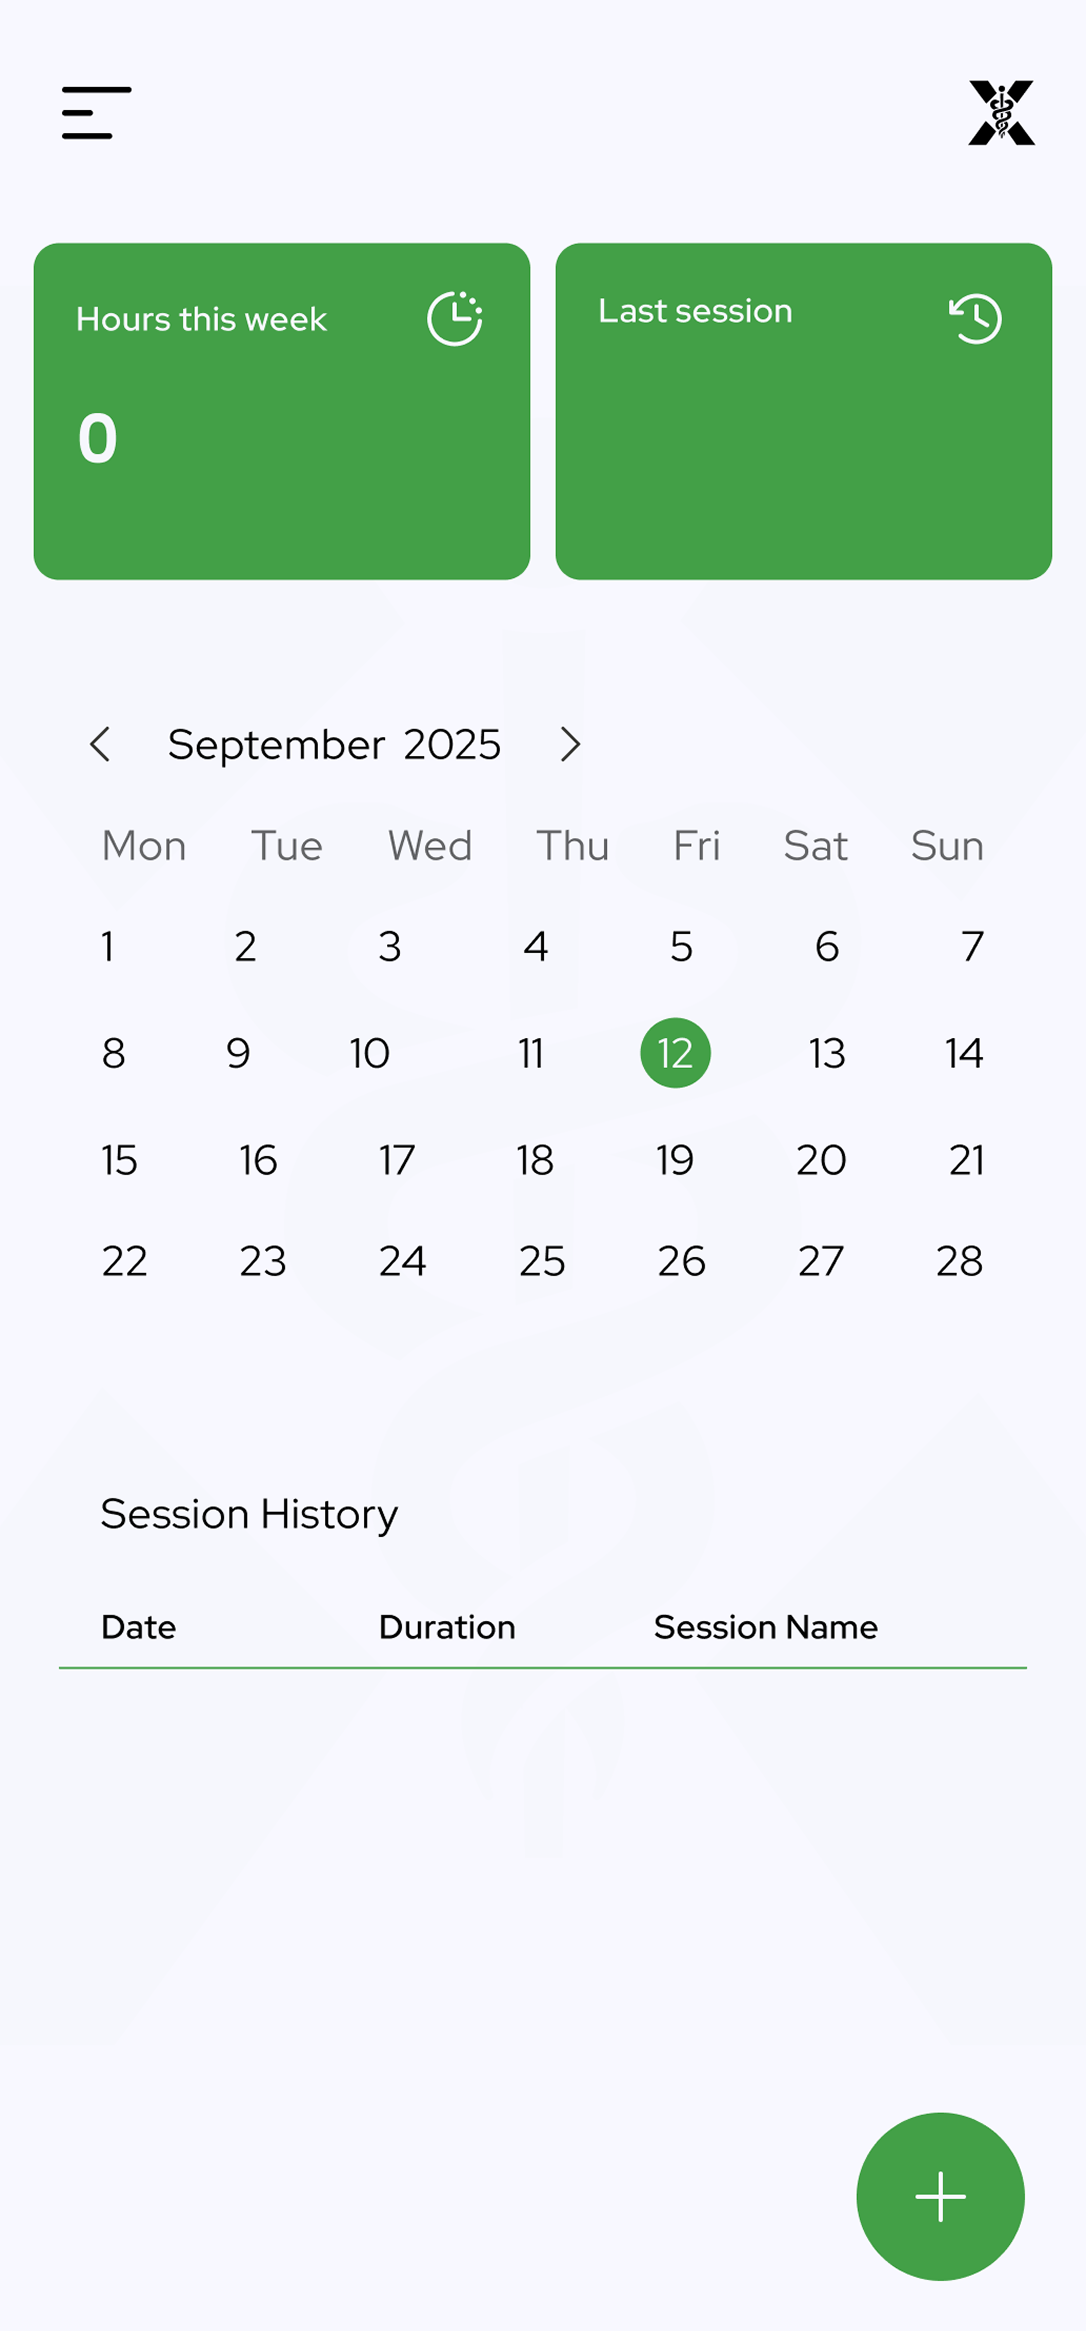
After setting your pin successfully, your homepage is loaded up and you can start a new session using the "+" button.
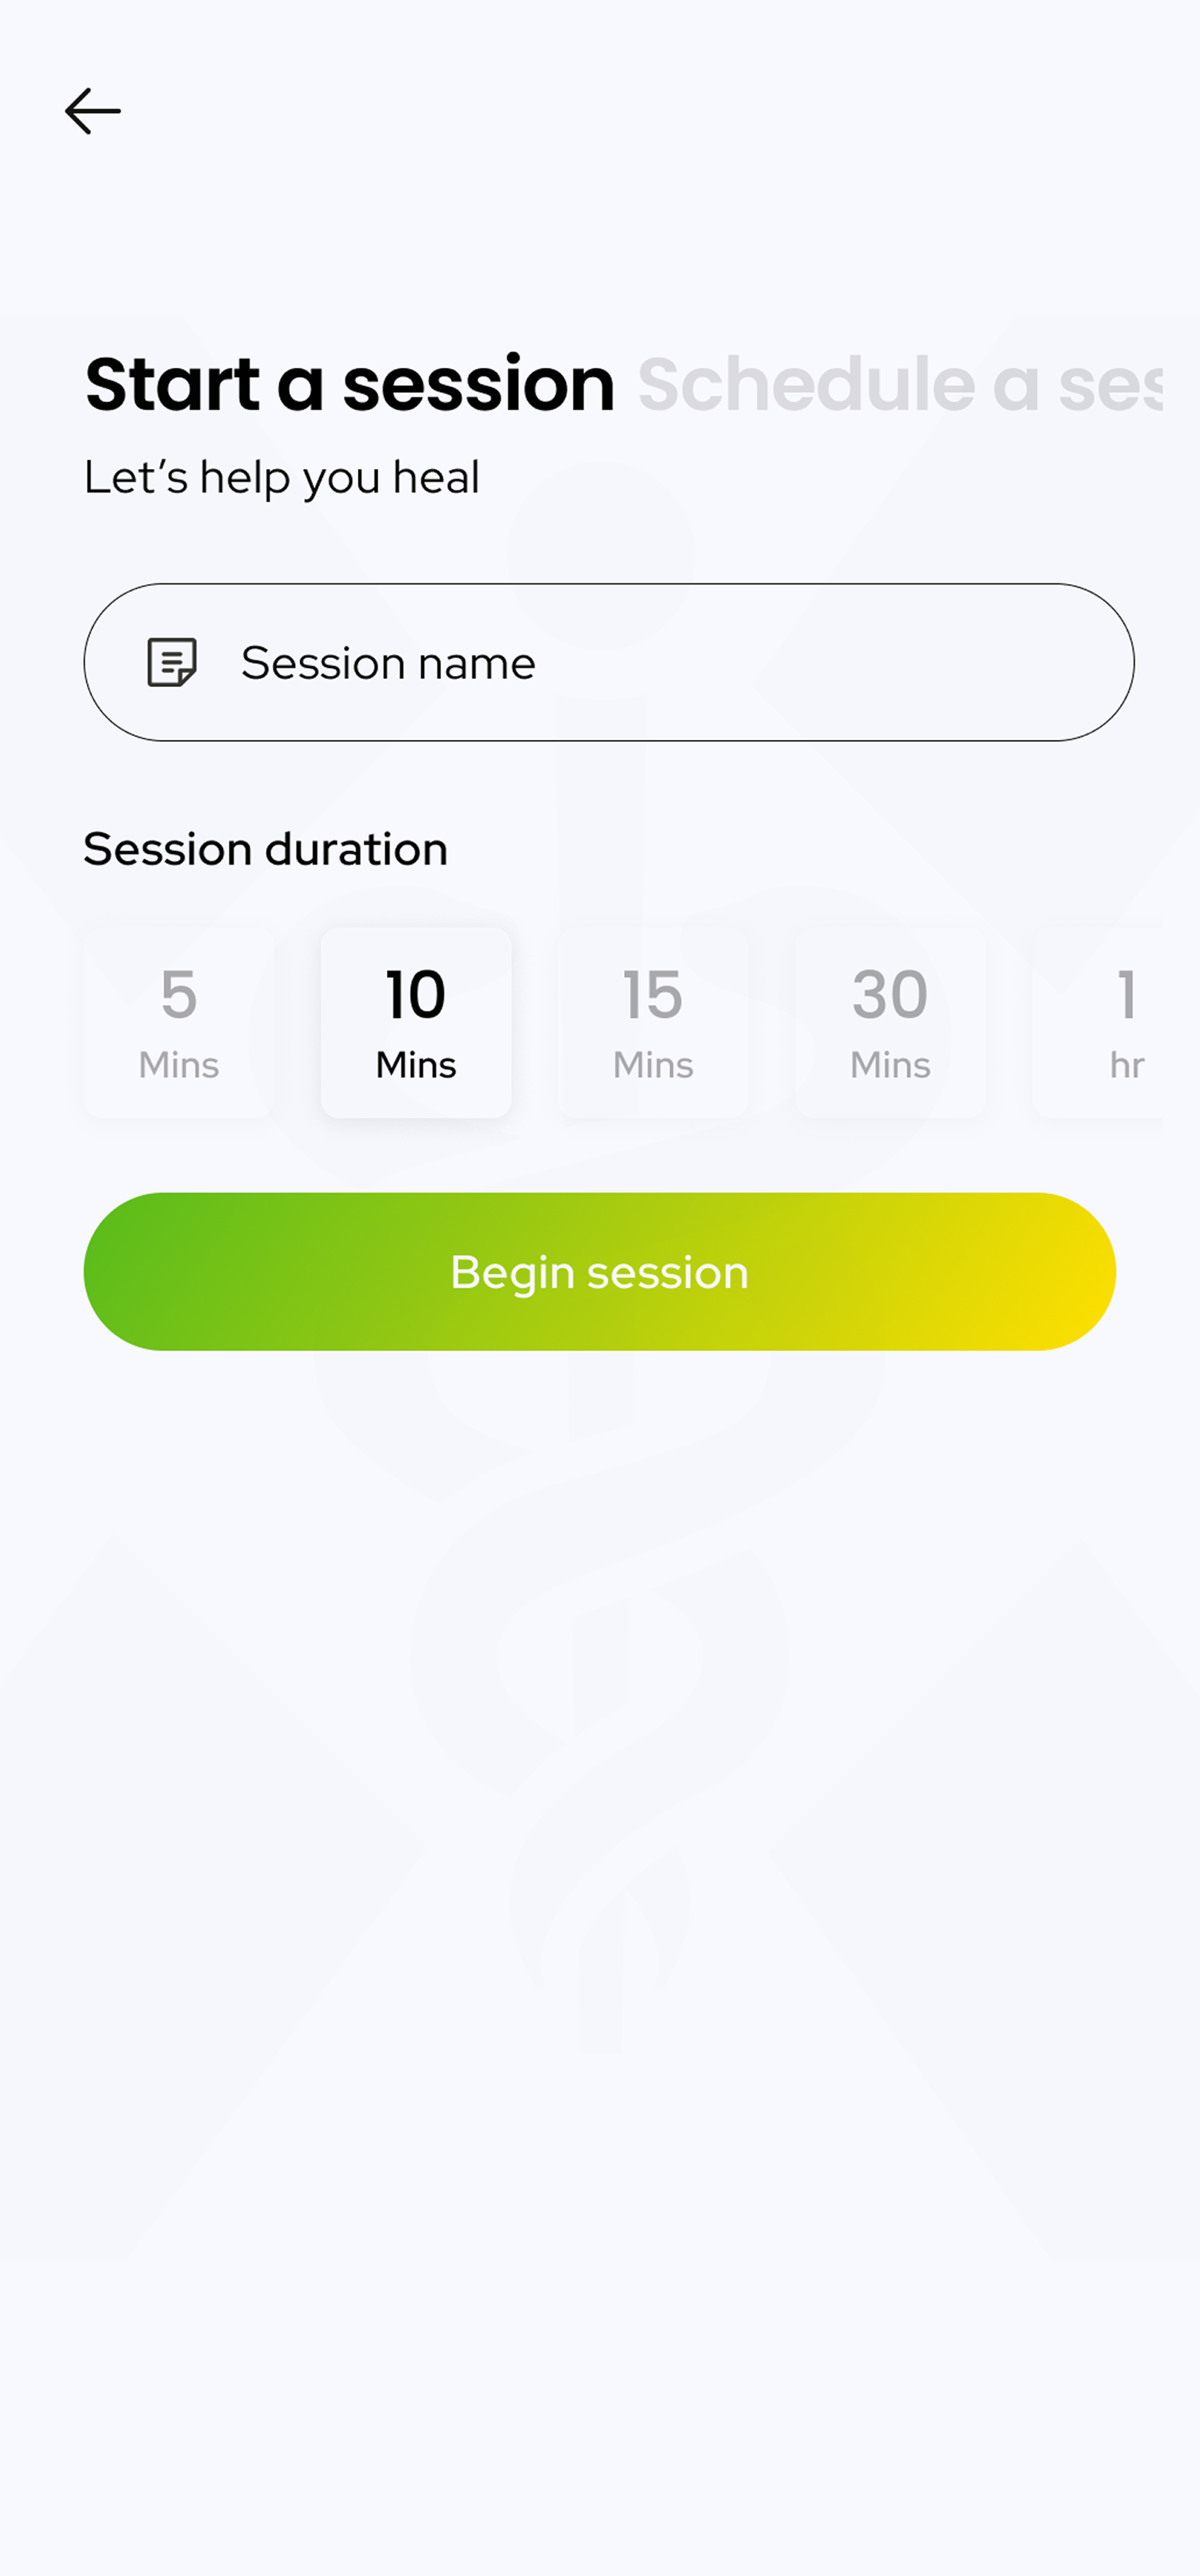
Step 4: Starting a session
Before starting a session, you have to set a session name and the duration for that session. You can also schedule a session for a future date as well which will show up on your calendar within the Theraxeus homepage.
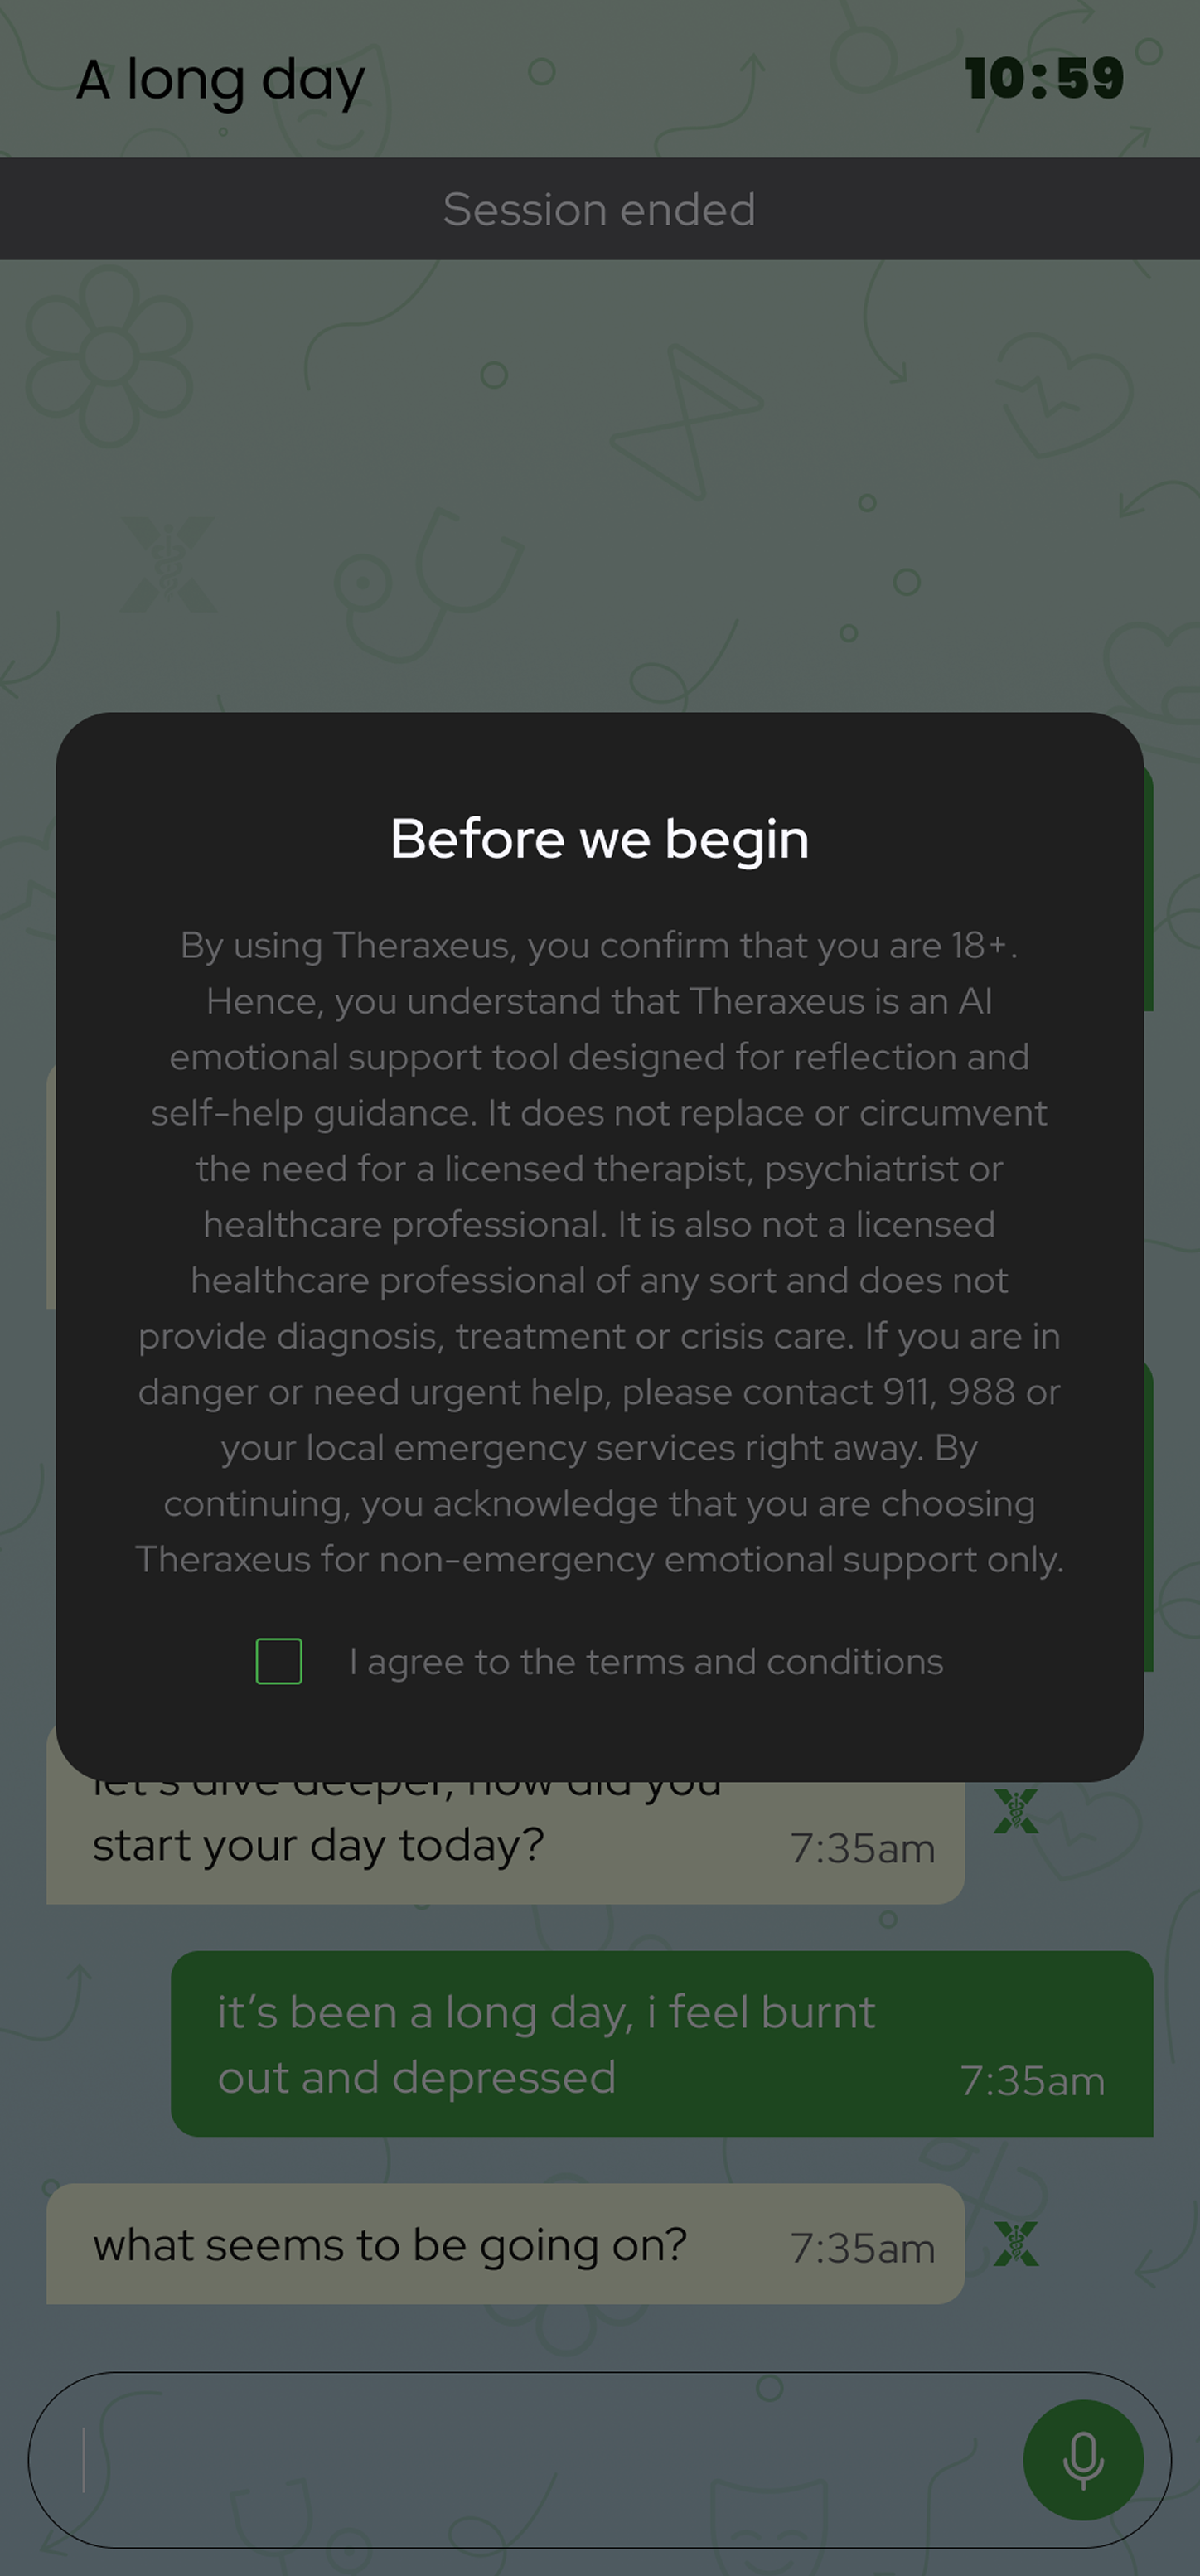
Step 5: Disclaimer
Read through the disclaimer properly and click on the "I agree" checkbox to proceed to the chat interface and begin the session.
Ending a session
A Theraxeus session ends after the set duration elapses, or you can end it manually at any time. The session is then summarised and saved to your history.
Session ends automatically
When the session duration you set has elapsed, the session closes and you are taken to the summary screen.
End manually
Tap the X button at any point during a session to end it early. You'll be prompted to confirm before the session closes and the summary is generated.
Resuming a session
Scheduled or paused Theraxeus sessions can be resumed from the homepage. Find the session in your history and tap to continue from where you left off.
Open Theraxeus homepage
Tap the Theraxeus card on the home screen and enter your privacy pin.
Find session in history
Scroll through the Session History list on the calendar view. Active sessions are clearly marked with their scheduled date and time.
Tap to resume
Tap the session entry from the list. You will be taken back to the chat interface to continue the conversation from where it ended.
Mood tracker
Track your emotional state daily and let Medxeus surface patterns and insights to help you better understand your mental well-being.